September 27, 2026 / Studio Practice
Sands of Karak: a developer-level walkthrough and design breakdown
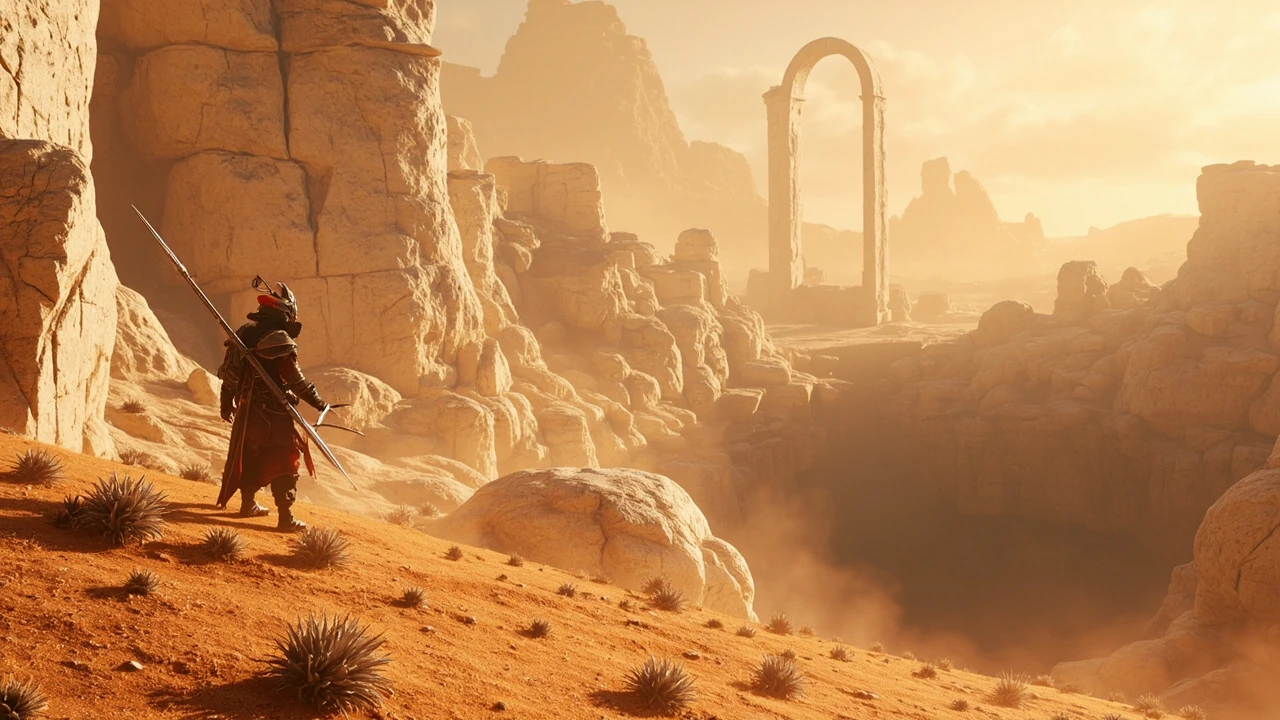
Sands of Karak: a developer-level walkthrough and design breakdown
A quick word of context for the people this page is actually written for: this is a GameDev editorial, not a fan guide. The Sands of Karak is a region in Hollow Knight: Silksong, and from a production standpoint it is one of the most instructive pieces of optional content in the game because it compresses almost every traversal system, encounter archetype, and gating mechanic that the studio has been refining across the entire project into a single mid-to-late Act 2 area. Anyone who has shipped, ported, or critically reviewed a 2D action game can learn a great deal by studying how the region is shaped and what it asks the player to do.
The region’s name itself is a useful first clue. The word “Sands” telegraphs the dominant visual material and movement cost: loose, frictionless ground that interrupts the clean platforming rhythm the rest of the game has been building. “Karak” reads as a fortified settlement, which the design immediately confirms with ruined architecture, a resident NPC who has clearly outlasted her neighbors, and an overall sense of a place that has seen better cycles. The point of this page is to walk through the Sands of Karak the way a developer or technical designer would, paying close attention to layout, gating, encounter density, optional content, and how the area expresses its design intent through space rather than text.
Throughout the article I will lean on the verified walkthrough for primary traversal and gating information, and use it only for facts it actually contains. Where I make observations about why a room is shaped the way it is, or how the section compares to other regions, I will mark that clearly as editorial analysis rather than sourced fact. The goal is to give an experienced reader something they could not get from a pure “how to get through it” guide.
Where the Sands of Karak fits in the game’s design
From a high-level design perspective, the Sands of Karak occupies a specific structural role. It is an Act 2 optional region that is only reachable after the player has committed to a particular upgrade path, and it is described in the official walkthrough as accessible via an unlikely entrance from the Blasted Steps. The phrase “unlikely entrance” is doing real work in the design. The studio is not just gating content behind a quest flag; it is gating it behind a movement ability that changes how the player reads the entire world map. The Sands of Karak is therefore less a side area and more a payoff zone for players who have already invested in their traversal kit.
You can see the same principle in the broader region list. Earlier Act 2 zones tend to introduce the new ability and show it off in a controlled room. The Sands of Karak does the opposite. It assumes the player has integrated the ability, and then asks them to use it across a long, demanding sequence that includes vertical wall-jumps, spiked climbs, and Clawline routes strung across multiple rooms. That is a deliberate escalation choice and it is one of the things that makes the region worth studying as a designer.
Three structural observations follow from that placement:
- The Sands of Karak is a mastery test, not a tutorial. The ability required to enter is the same ability that solves the area’s platforming challenges, so the room design can assume competent input.
- Because the region is optional, the difficulty curve inside it can be tuned more aggressively than in mandatory areas, where the team has to keep the broader population moving forward.
- The walkthrough explicitly notes that certain aspects of the area may change in Act 3. That is worth highlighting as a production decision: even optional regions are being treated as stateful, which is rare in this genre and raises the bar for QA.
Prerequisites, gating, and the player’s mental model
According to the verified walkthrough, the earliest the Sands of Karak can be discovered is after obtaining the Clawline upgrade in the Underworks’ Cauldron area below the Whispering Vaults in Act 2. That single sentence contains three production-relevant decisions worth unpacking.
First, the gating is not item-based but ability-based. The Clawline is a movement upgrade, not a key item, and it has utility across the entire game. That means gating the Sands of Karak behind it does not waste player time collecting a token that does nothing else; it requires a permanent skill investment. For a designer, this is the cleanest way to gate an optional area: the player is rewarded for investing in their own kit, and the gated content exercises the new skill immediately.
Second, the gating is layered. The walkthrough specifies that the Clawline must be obtained in the Cauldron area below the Whispering Vaults, which means a player has to navigate a sub-region of a sub-region before they are even eligible to find the Sands of Karak. That is several layers of sub-area dependency on a single quest flag, and it is a real-world example of how quest flags and ability flags can become intertwined. For a producer, the takeaway is that the order in which a player picks up the Clawline determines the order in which several optional spaces become available, which has implications for QA coverage and for save-state testing.
Third, the entrance route is described as indirect. Players are told to return to the Blasted Steps via the Bellway and head right to a large vertical room, then descend to a specific opening on the left. This is not a single visible door; it is a route. The walkthrough leans heavily on the phrase “make your way down to the first opening on the left”, which is a strong signal that the room is read primarily by geometry rather than by signposting. The team is trusting the player’s ability to parse a wide vertical slice and pick the correct branch.
Layout of the entrance and the first meaningful encounter
Once the player has committed to the route, the walkthrough describes a long tunnel that opens into a large open area where the friendly Pinstress lives in a floating hut. This is one of the most editorially interesting moments in the region, and it is worth slowing down on it.
The Pinstress is a named NPC who is clearly established as friendly and is placed in a visually distinct structure. From a level design perspective, a floating hut in a desert of thorny coral and hungry worms is doing several jobs at once:
- It serves as a soft save anchor. The player knows that if they fall, die, or get lost, they can warp back to a recognized landmark.
- It provides spatial orientation in a region that, by the player’s own testimony, is a confusing network of tunnels.
- It signals that the area is not entirely hostile, which is important for an Act 2 region where the player has already been through many hours of danger. A purely hostile optional zone feels punitive; a zone with a resident NPC feels inhabited.
Just outside her abode, the walkthrough notes a series of rings the player can Clawline to, leading left to a broken pillar, with a long wooden platform reached by climbing up and then drifting back right along fierce winds. The mention of fierce winds is a useful clue. Wind in this game is a movement modifier, not just visual flavor. A wind corridor that “drifts” the player back to the right is asking the player to fight the drift on the way in and surrender to it on the way out, which gives the traversal a clear directionality even though the underlying geometry is symmetric.
From there, the player is told to Clawline into the far wall to move upward, slide down a broken pillar to the left to Clawline to a ring further left, and then wall-jump upward to reach a high ledge past one more ring. Read that sequence slowly. It is five linked actions, each of which leaves the player in a different kinematic state: Clawline, climb, drift, slide, wall-jump. For an action designer, this is a chain rather than a room. The room’s difficulty is not the difficulty of any single action but the difficulty of recovering from each one into the next without losing state. The Sands of Karak is therefore a good case study in how a level can be hard without any single action being unfair.
Verticality, spikes, and the long climb to the new region
Above the Pinstress sequence, the walkthrough describes a long pathway full of spikes that the player has to wall-jump up to navigate, with a warning to be ready to evade Pharlids during the climb. The keyword here is “long”. Spiked vertical climbs are a known genre device, and the interesting question for a developer is not whether to use them but how to keep them interesting across dozens of rooms.
Three techniques are visible in this section:
- Verticality is reinforced by ambient reads. The walkthrough calls out Pharlids on the wall above and instructs the player to bait them with attacks. That implies the spiked climb is not a pure platforming segment; it is a mixed-traffic segment where platforming and combat must be solved together.
- Sub-rooms are differentiated by the type of hazard. One sub-room is dominated by spikes, another by wind, another by hostile fauna, and the transition between them is marked by a clear geometric change such as a break in the wall or a wider platform.
- The climb terminates at “the new region”, which means the area has a clear internal climax. There is a moment where the player pops out of the climb into a wider, calmer space, and that moment is a pacing reward for surviving the corridor.
For a developer, the takeaway is that the Sands of Karak does not try to invent a new traversal system. It recombines existing systems in longer, more demanding chains than the rest of the game uses, and the difficulty comes from the recombination, not from new mechanics. That is a sustainable way to scale difficulty in a 2D action game because the QA surface stays roughly constant while the player-side difficulty grows.
Encounter design: the role of the Pharlids
Pharlids appear several times in the walkthrough, including in the climb sequence and as patrolling enemies in adjacent rooms. They are the canonical fauna of the Sands of Karak, alongside the unnamed hungry worms referenced in the region’s prose introduction, and they are doing real encounter-design work.
The key observation is that Pharlids are placed on walls, not on floors. That single placement choice has cascading consequences:
- It forces the player to fight while airborne or while wall-jumping, which is the most punishing kinematic state in the game.
- It means that a naive approach to combat, which is to stand on the ground and trade hits, is not viable. The encounter forces the player to use the same Clawline and wall-jump tools that they just used in the platforming section.
- It allows the enemy to patrol in a way that is read by the player in advance, because wall-mounted enemies are visible from further away than floor enemies occluded by foreground props.
The walkthrough’s instruction to “bait” a Pharlid with attacks from below is also a useful signal. A baitable enemy is an enemy that has a clear aggro distance, a clear aggro timer, and a clear recovery window. From a combat design perspective, that means the encounter is winnable by a player who has read the enemy’s rhythm, even if the player is undergeared or under-skilled. The game is rewarding observational play over raw execution.
Optional content and the Act 3 difference
One of the most interesting design decisions in the Sands of Karak is also one of the easiest to miss on a first playthrough. The walkthrough explicitly says that while the region remains an optional endeavor in Act 2, “those wishing to uncover a truer ending may be compelled to revisit this area in Act 3, though certain aspects of the area may change at this point”. The walkthrough then states that it will cover the region as it exists in Act 2.
This is a meaningful production choice. It means the Sands of Karak is not a single static space. It is a region with at least two states, and the player’s experience of the region in Act 3 will not match the experience documented in a standard walkthrough. For a developer, several things follow from that:
- QA has to test the region at minimum twice, and potentially more if there are additional states tied to save data or quest progression.
- The walkthrough itself has to be qualified by act, which the source page does correctly by saying it covers Act 2. Walkthrough writers cannot write a single canonical description of an area that changes.
- Players who skip the area in Act 2 because they are saving it for a later point in their progression still have a reason to come back, which keeps the region relevant across a long playtime arc.
From a designer’s perspective, the Act 3 difference is also a useful piece of narrative staging. The same geography carrying different content in different acts is a way of saying that the world itself is shaped by story progress, not just by player actions. That is a much stronger worldbuilding tool than simply opening a new door.
How the region compares to other optional zones
Most optional regions in this kind of game fall into one of three structural buckets: a self-contained puzzle room, a small reward corridor, or a large exploration network. The Sands of Karak is in the third bucket, but with a few caveats worth noting.
| Attribute | Standard optional zone | Sands of Karak (per walkthrough) |
|---|---|---|
| Typical gating | Key item, currency, or single ability | Specific ability (Clawline) obtained in a specific sub-area |
| Traversal focus | One or two movement systems | Chain of Clawline, wall-jump, wind drift, and slide |
| Combat focus | One enemy archetype | Wall-mounted Pharlids plus ground fauna |
| Resident NPC | Rare | Yes, the Pinstress in a floating hut |
| State across acts | Static | May change in Act 3, with truer-ending content |
| Estimated replay value | One visit | At least two visits depending on ending path |
The comparison is not meant to be a value judgment, but it shows how the Sands of Karak stretches the optional zone template in two directions at once. It is more mechanically demanding than a typical reward corridor, and it is more stateful than a typical exploration network. From a production standpoint, that means it costs more to build, test, and document, and it is also more likely to drive word of mouth because it is the kind of place players describe to each other.
Production constraints implied by the design
For producers and leads reading this, the Sands of Karak is a useful object lesson in the kinds of constraints a region like this imposes on the team. I have grouped them by area so they are easier to map onto a real production schedule.
| Production area | Constraint implied by Sands of Karak |
|---|---|
| Level design | Long, chained traversal sequences require careful kinematic tuning so a single failed input does not collapse the room |
| Animation | Clawline, slide, and wall-jump animations must blend cleanly mid-chain, including with wind drift applied |
| Combat | Enemies that share a kinematic state with traversal hazards need separate balance passes from floor-only enemies |
| Quest scripting | Layered gating means several quest flags must resolve in a specific order, increasing save-state test count |
| QA | Act 2 and Act 3 variants mean the region must be tested under at least two world-state conditions |
| Localization | The NPC’s dialogue and the small amount of readable signage in the region must be reviewed in every supported language |
| Documentation | External walkthroughs need act-qualified descriptions rather than single canonical answers |
None of these are exotic by genre standards, but they reinforce that a region like this is not free. Every additional system in the chain is a small additional QA surface, and a region that combines four systems in long sequences is more expensive than four regions that each use one system in a short sequence.
What to look for as a player-designer hybrid
For readers who are doing both jobs at once, the Sands of Karak is a region that rewards the kind of observation a designer would do naturally. The list below is not a checklist of things to do, but a checklist of things to notice. The order roughly mirrors a first-time walkthrough so it doubles as a passive observation guide.
- Notice the moment the area stops being a “side path” and starts being a “region”. For most players, that transition happens around the Pinstress’s hut, when the geometry opens up and a named landmark becomes visible.
- Notice the wind. The walkthrough mentions fierce winds as a movement modifier in the platforming sequence, and that wind is the first clear sign that the region’s pacing is about chain length, not raw speed.
- Notice the spiked climb. That climb is the clearest single piece of “the game has trust in you” design in the region. A climb with no checkpoints, no shortcuts, and a patrolling wall enemy is a deliberate statement about what the player is expected to handle.
- Notice the rings. Clawline rings are scattered across the area and they are doing two jobs: they let the player move, and they let the level designer show the player where to move. A room full of rings is a room that has been hand-tuned for one specific path.
- Notice the absolute silence between encounters. The walkthrough is mostly quiet between combat beats, which means the team is comfortable letting the player breathe. That is a design choice, and it is one of the easier things to over-rotate on in a tight production schedule.
Failure modes and what they teach the designer
It is worth naming the failure modes the region is clearly designed to expose, because they are the most useful lessons for a developer who is not on the project. A failure mode is the specific way the design is allowed to break the player, and each one tells you something about the team’s tolerance for player friction.
- Missed Clawline input. The chain of Clawline, climb, drift, slide, and wall-jump has a high miss cost. The room design is implicitly telling the player that missing a Clawline input in this area is more expensive than missing one in an earlier area, and the player learns that the deeper they go.
- Wasted stamina or resource bar. Long chains in this game tend to consume a resource the player has to manage. The Sands of Karak is built to be solved with a full bar, which trains the player to refill before entering long sequences. That is a teachable moment delivered through geometry rather than a tutorial pop-up.
- Aggressive fauna timing. Pharlids have a known aggro behavior and a known recovery window. Failing to read either is a fair loss, which is exactly what an action game wants from its mid-game encounters.
- Route ambiguity in the Blasted Steps entrance. The walkthrough’s instruction to head right, descend to a large vertical room, and then make your way down to the first opening on the left is a real test of map reading. If a player gets lost here, the failure is not the room’s fault; it is the player’s, and the region is honest about that.
How to scope a walkthrough page responsibly
Because the walkthrough I leaned on is explicitly qualified to Act 2, and because the region has content that may change in Act 3, a responsible walkthrough for the Sands of Karak has to do three things that this page has tried to do throughout. First, it must declare which act it is describing, so a returning player in Act 3 does not get an outdated answer. The official walkthrough handles this by saying outright that it will cover the region as it exists in Act 2, and any responsible third-party walkthrough should do the same.
Second, it must distinguish sourced fact from editorial observation. Sourced fact here includes the Clawline prerequisite, the Blasted Steps entrance, the Pinstress’s hut, the wind, the spiked climb, the Pharlids, and the Act 3 difference. Editorial observation includes the discussion of chain length, the encounter design, the comparison table, and the production constraints. The reader should be able to tell the two apart at a glance.
Third, it must be honest about gaps. The walkthrough excerpt I leaned on does not, for example, describe the Sands of Karak’s reward structure in any detail, and the region’s act-3 changes are explicitly unknown. Rather than fill those gaps with invented detail, a responsible article leaves them as open questions. For a developer writing or reviewing a walkthrough, that is a useful editorial standard to enforce in any QA pass.
Frequently asked questions
What is the Sands of Karak in Hollow Knight Silksong?
The Sands of Karak is an Act 2 optional region located on the northwestern edge of Pharloom. According to the walkthrough, it is a dusty barren waste of thorny crusted coral remnants, hungry worms, and the ruins of a once proud settlement, and it is only accessible via an indirect entrance from the Blasted Steps. As an editor’s note, the fact that the area is described as the one lush and coral-filled region now reduced to a barren waste is doing real worldbuilding work; it is signaling that the world’s state has changed rather than simply introducing a desert biome.
What do I need to access the Sands of Karak?
You need the Clawline upgrade, which the walkthrough says you obtain in the Underworks’ Cauldron area below the Whispering Vaults in Act 2. After that, you return to the Blasted Steps via the Bellway, head right into a large vertical room, and descend to a specific opening on the left to find the long tunnel that leads to the area. There is no separate key item or currency required; the gating is purely ability-based.
Why is the Sands of Karak considered difficult?
The difficulty comes from the length and chaining of the traversal sequences rather than from any single hard room. According to the walkthrough, the player has to chain Clawline inputs, wall-jumps, a wind-drift segment, a slide, and an extended spiked climb with patrolling Pharlids. Each of those individual actions is manageable on its own; the difficulty is the cost of recovering from a single missed input partway through the chain.
Does the Sands of Karak have a friendly NPC?
Yes. The walkthrough describes a friendly Pinstress living in a floating hut in the large open area at the end of the entrance tunnel. From a design perspective, she functions as a landmark, a soft save anchor, and a sign that the region is inhabited rather than purely hostile. The hut is also visually distinct enough to be readable from a distance, which is a small but useful piece of level-signposting design.
Do the Pharlids in the Sands of Karak patrol walls?
The walkthrough states that one patrols the wall above the spike climb and instructs the player to bait it with attacks from below. That confirms Pharlids are wall-mounted enemies rather than ground enemies, which has consequences for combat. The player has to fight while airborne or wall-jumping, which is a much higher-skill kinematic state than standing on a flat surface and trading hits.
Is the Sands of Karak required to finish the game?
In Act 2 the walkthrough explicitly describes it as an optional endeavor. The walkthrough does note, however, that those wishing to uncover a truer ending may be compelled to revisit the area in Act 3, where certain aspects of the region may change. That means the area is not required for a baseline Act 2 completion, but it can become required depending on the player’s chosen ending path.
What is the fastest route from the Blasted Steps to the Sands of Karak?
According to the walkthrough, the route is: from the Blasted Steps, use the Bellway, head right into a large vertical room, descend to the first opening on the left, follow the long tunnel to the large open area with the Pinstress’s floating hut, and then continue past the hut into the ring-and-climb platforming sequence that leads upward into the rest of the region. I have not included any timing estimates because the walkthrough does not provide them, and I do not want to invent figures for an area I have not personally tested.
Does the Sands of Karak change between Act 2 and Act 3?
The walkthrough says that certain aspects of the area may change in Act 3, while explicitly stating that the walkthrough itself covers the region as it exists in Act 2. As an editor’s note, this is a real production decision: even an optional region is being treated as stateful, which has implications for testing, documentation, and walkthrough writing. Players who have already seen the Act 2 version of the area should not assume that an Act 3 visit will look or feel the same.
Is the Sands of Karak a good area to learn advanced traversal in?
It is a good area to be tested on advanced traversal, but it is not a good area to learn it in. The walkthrough’s prerequisite is the Clawline obtained in a sub-area, and the platforming sequences in the Sands of Karak assume that ability is already integrated. A player who is still getting comfortable with the Clawline will likely struggle in this region, and a designer evaluating the area as a learning space should treat it as a mastery test rather than a teaching space.
Where can I read a verified walkthrough of the Sands of Karak?
The walkthrough excerpt used for this page is the Sands of Karak Walkthrough published on the Hollow Knight Silksong wiki at IGN. That page is explicitly qualified to Act 2, and it is the source I have leaned on for the entrance, gating, and traversal facts here. For Act 3 specifics, you will need a source that explicitly covers the Act 3 state of the region, because the source used here does not.