August 12, 2026 / Studio Practice
Mehndi design: a practical guide to patterns, placement, and aftercare
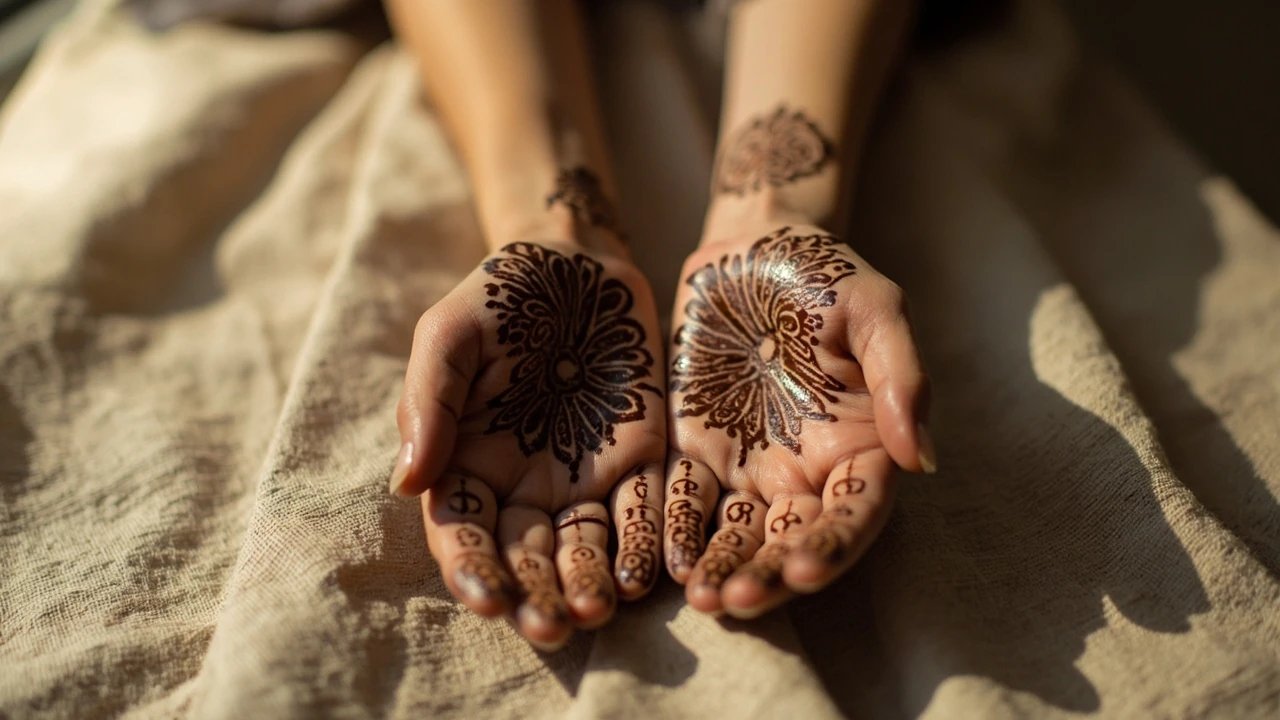
Few body-art traditions translate as clearly from a small cone to a finished stain as mehndi design. The paste is squeezed through a narrow tip in thin, confident lines, dries on the skin, and then falls away to reveal an orange mark that deepens over the following day. The visible result is what most readers mean when they search for mehndi design: the layered floral vines, the negative-space palm motifs, the border of small leaves running along the fingertips. The less visible craft is the planning that sits behind those lines, from the choice of pattern family to the way the paste is loaded and released.
This guide focuses on that planning layer. It is written for readers who already know what henna is, who are choosing or commissioning a specific mehndi design, and who want a clearer framework for pattern, placement, and aftercare. It does not cover industrial hair dyes, black henna, or any product labelled “mehndi” that is not derived from the henna plant. Where a statement depends on a specific fact such as stain timing or a safety warning, the article points to the source so the reader can verify it independently.
What a mehndi design actually is
A mehndi design is a temporary body pattern created by applying a paste made from the crushed leaves of the henna plant (Lawsonia inermis) to the skin. The paste stains the outermost layer of the skin a reddish-brown colour through a natural dye molecule called lawsone. The pattern itself is a hand-drawn or stenciled composition that sits somewhere within a recognised visual vocabulary: vines and florals, geometric grids, checks and dots, peacock and paisley forms, Arabic leafy trails, and the very dense “bridal” layouts used across South Asia, the Middle East, and North Africa.
Most readers searching for mehndi design are not looking for a history of henna or a botanical description of the plant. They are usually deciding what kind of pattern to wear, where to place it, or how to make the stain last. The remainder of this article is organised around those decisions, with the technical background kept short so the practical content stays in the foreground.
Pattern families used in a mehndi design
Patterns marketed as mehndi design are usually grouped by region or by visual density rather than by a strict catalogue. Knowing the family makes it much easier to talk to an artist, to choose a reference image, or to plan a piece at home, because the families share a common grammar of line weight, fill, and negative space.
- Indian: dense, fine-line work, often covering the full palm, with a strong central motif and symmetrical filler. Common on brides and at festivals such as Karva Chauth and Diwali.
- Arabic: bolder outlines, larger floral and leafy shapes, more visible skin between elements. The design reads clearly from a distance, which is why it is often chosen for parties.
- Moroccan and North African: geometric, with diamonds, triangles, and grids. Lines are usually thicker and the composition is built around negative space rather than filler.
- Pakistani and Indo-Arabic blends: often combine Indian density with Arabic florals, including jaal (net) work, jaal-filled paisleys, and shaded outlines.
- Modern or fusion: contemporary adaptations such as minimalist wrist bands, finger-only chains, mandala back-of-hand pieces, and Western motifs including henna crowns, name writing, and fine-line tattoo-style linework.
These families are labels of convenience rather than hard rules. Most working artists mix elements across families, and a single bridal mehndi design will typically include Arabic florals on the feet and Indian fine-line work on the palms in one sitting.
Where a mehndi design is typically placed
Placement is decided by the event, by how long the stain needs to last, and by how visible the design needs to be. The hands and feet stain darkest because the skin is thicker there and lawsone binds more readily to the keratin in the stratum corneum. Inner forearms, ankles, and the sides of the ribcage stain more softly and fade faster.
| Placement | Typical use | Stain depth expectation | Notes for planning |
|---|---|---|---|
| Palm only | Casual, office-friendly, first-time wearers | Deep orange to brown, often the darkest part of any mehndi design | Palm skin is callused, so lines need a slightly steadier hand and a finer cone |
| Back of the hand, wrist, and forearm | Festivals, Eid, Karva Chauth, mehndi nights | Medium stain, more even than the palm | Easy to photograph and to read from across a room |
| Fingers only or fingertip bands | Minimalist modern mehndi design, work settings | Patchy, can fade quickly because fingers are washed often | Best for short events rather than week-long wear |
| Feet and ankles | Bridal, traditional ceremonies, sangeet | Deep stain, tends to last longer than hands because feet are covered | Plan for the artist to work with the foot flexed and supported |
| Back, shoulder, ribcage, or stomach | Engagement or maternity sessions, modern fashion | Lighter, more orange than brown, fades within a week | Skin stretches, so avoid lines that cross joints or stretch marks |
| Nape of the neck, behind the ear, hairline | Festival fashion, henna crowns | Variable, depends on skin and washing | Hairline designs need careful paste drying and protection from sweat |
A common planning mistake is to choose a bridal-scale layout for the back of one hand. A large mehndi design is harder to hold steady on a small area, the lines start to merge, and the stain on the back of the hand is usually lighter than the palm, so the result photographs less sharply than expected. Working with the surface rather than against it is part of what separates a clean piece from a muddy one.
Reading a mehndi design reference
Reference photos are useful, but they are also a common source of disappointment because the camera and lighting can hide the work involved. A photo of a deep, even, fine-line Indian mehndi design is the result of roughly two to four hours of seated work, a tightly held cone, and consistent line pressure. It is not a five-minute task with a squeeze tube.
When choosing a reference, it helps to separate three things: the composition, the line work, and the fill. Composition is the layout, where the central motif sits and how the eye moves through the piece. Line work is the weight and steadiness of the outline. Fill is the shading, dots, and jaal inside each shape. A reference image is useful mainly for composition, and the line work and fill should be judged against the artist’s portfolio rather than the photo.
Questions to ask before committing to a reference
- How long is the sitting, and is that realistic for the event schedule?
- Will the reference be drawn at one-to-one scale, or will it be simplified onto a smaller area?
- Is the artist’s portfolio made up of the same family of mehndi design shown in the reference?
- Does the reference use fine jaal that the artist is comfortable holding at the right pressure?
- If the design is for a wedding, will the artist return the next day for touch-ups after the first stain develops?
Asking these questions before the appointment is far more effective than asking for a refund afterwards. A mehndi design is a temporary art, but the sitting is real time and the decision deserves the same care as choosing a hairstylist or a tailor.
Building a balanced composition from scratch
A balanced mehndi design is usually built around a single anchor shape. The anchor is the motif the eye lands on first, typically a central medallion on the palm, a mandala on the back of the hand, or a paisley that runs from wrist to fingertip. Once the anchor is placed, the rest of the design is a decision about how to fill, frame, and exit the piece without crowding the anchor.
The simplest planning method is to draw three concentric zones on a tracing-paper outline of the hand or foot, then assign a different role to each zone.
| Zone | Role in the mehndi design | Typical content |
|---|---|---|
| Centre | Anchor and focal point | Mandala, lotus, peacock, or single bold paisley |
| Middle band | Connective tissue | Vines, leafy trails, repeating florals, jaal netting |
| Edge | Frame and exit | Border of leaves, dots, scallops, or a defined wrist cuff |
This three-zone approach is not a rule. Bridal mehndi design often uses four or five zones because the goal is full coverage rather than a focal point. Minimalist modern pieces, by contrast, may collapse the whole layout into a single zone, usually a wrist cuff or a finger chain, and leave the rest of the hand empty. The point of the framework is to make a deliberate choice rather than a default one.
Tools and materials that change the result
Almost any mehndi design can be drawn with three things: a fine-tipped applicator, a paste that holds its line, and a steady hand. The choice of tool matters because it changes how the artist works, not because one tool is universally better than another.
- Traditional plastic cone: a hand-rolled cone made from a cellophane or plastic sheet, cut at the tip. The standard tool for Indian and Pakistani fine-line work. The line weight is controlled by the angle of cut and by the pressure on the cone.
- Jacquard or ready-made cone: a factory-filled applicator with a fixed tip. Convenient and consistent, but the artist has less control over line weight mid-piece.
- Squeeze bottle with metal tip: common in salon and festival settings, useful for bold Arabic-style outlines and for filling larger shapes quickly.
- Stencil and cotton swab: suitable for simple geometric mehndi design, dots, and chevrons. Not appropriate for florals or fine-line work.
- Stick-on applicator or roller: a newer format. Useful for very small motifs and for younger children, but limited in what it can express.
The paste itself is more variable than the tool. A good paste is fine-ground, sifted to remove stem fragments, mixed with a mildly acidic liquid such as lemon juice or a sugar-water brew, and rested for several hours so the lawsone can release. Paste that is too thick will not flow, paste that is too thin will bleed. For readers who buy rather than mix, the only meaningful quality test is a short line on the back of the hand: it should hold its shape, then settle flat within a few seconds, and not run sideways into the surrounding skin.
Aftercare: how a mehndi design actually darkens
Most of the visible change in a mehndi design happens after the paste comes off, not while it is on the skin. The paste needs to stay in contact with the skin for as long as practical, ideally four to eight hours, so that lawsone has time to migrate into the stratum corneum. Once the paste is scraped or washed away, the mark looks pale orange. Over the next 24 to 48 hours, the mark oxidises and darkens to a deeper reddish-brown.
The standard aftercare routine is straightforward, but the order matters.
- Leave the paste in place. Do not wrap the design in plastic unless the artist has specifically asked for it, because trapped sweat can dilute the paste and lift it off the skin.
- Scrape, do not wash. Once the paste is dry and cracked, push it off with a blunt edge such as a spoon or a fingernail. Water at this stage will pull dye out of the skin.
- Apply a sealant. A thin coat of lemon-sugar syrup, a balm such as coconut oil or shea butter, or a leave-on conditioner keeps the oxidising layer in place.
- Avoid water for several hours. Swimming, hand-washing, and showering all lighten the stain in the first 12 hours. After that, water contact is fine.
- Keep the area warm. Heat helps the stain develop. Cold hands and feet stain more slowly than warm ones.
Two warnings are worth stating clearly. The first is that “black henna” is not henna at all. It is a paste mixed with a synthetic dye called paraphenylenediamine, or PPD, which can cause severe allergic reactions and long-term skin sensitisation. Any product offered as a dark mehndi design that stains black within minutes is not safe for skin. The second is that essential oils such as tea tree, eucalyptus, and lavender can sensitise skin when applied at full strength alongside henna. The relevant safety information is summarised on the English Wikipedia article on henna, and readers who want more detail can review the U.S. Food and Drug Administration’s page on henna and its regulatory status.
Common mistakes when planning a mehndi design
Most problems with a mehndi design are planning problems, not execution problems. The same mistakes show up in studio after studio, and a short list is more useful than a long one.
- Choosing a reference at the wrong scale. A bridal-scale layout cannot be reproduced at fingertip size; the lines merge and the design turns into a smudge.
- Booking too little time. A full-hand Indian mehndi design takes two to four hours; a full bridal set on both hands and both feet can take six to ten hours across two sittings.
- Washing hands during the paste stage. Even a small splash of water at the wrong moment can lift a fine line.
- Applying lotion or oil before the artist arrives. A greasy surface repels paste, so the stain develops patchily.
- Layering too much detail. A piece with twenty motifs of the same size is harder to read than a piece with three motifs of different sizes.
How long a mehndi design actually lasts
A mehndi design on the palm or the sole of the foot can last one to three weeks, because the skin there turns over more slowly. A design on the back of the hand, the wrist, or the forearm usually lasts five to ten days. Designs on the fingers and fingertips tend to fade fastest, simply because those areas are washed and used more often.
| Placement | Realistic wear time | Main reason it fades |
|---|---|---|
| Palm and sole | 1 to 3 weeks | Thick stratum corneum, slow cell turnover |
| Back of hand | 7 to 12 days | Frequent washing and contact with surfaces |
| Wrist and forearm | 5 to 10 days | Clothing friction, hand-washing, sweat |
| Fingers and fingertips | 3 to 7 days | High contact area, soap exposure |
| Back, shoulder, or stomach | 5 to 10 days | Clothing friction, showers, lotions |
Wear time is a property of skin and behaviour, not of the artist’s skill. A masterfully drawn mehndi design on the inside of a finger that is washed ten times a day will fade faster than a casual design on a palm that is left alone. Setting expectations honestly is part of the craft.
Planning a mehndi design for a specific event
Different events ask different things of a mehndi design, and the planning differs for each. A short, high-visibility design is right for a daytime gathering. A long, dense, photo-ready design is right for a wedding. A child-friendly design is right for a school event. The same artist will approach each one differently.
- Casual daytime event: one hand, modern or Arabic-style, finished in 30 to 60 minutes. Focus on clean lines and a clear focal motif.
- Eid, Diwali, Karva Chauth: both hands, possibly the wrists and forearms, 90 minutes to 3 hours. Layer the design so it reads from across a room.
- Engagement or sangeet: full hands, feet, and possibly a small back or shoulder piece, 3 to 6 hours across the day. Plan a rest period between hands and feet.
- Wedding day: full bridal mehndi design, often across two days, including the groom’s name hidden inside the pattern, a duplicate motif on each hand, and detailed feet. Allow a buffer of several hours in case of last-minute changes.
- Maternity or henna crown: gentle, non-tight patterns, focused on aesthetics rather than coverage. The artist should be briefed on the stage of pregnancy so positioning is comfortable.
Whatever the event, the most useful preparation is the simplest: a clean, dry, lotion-free surface, a confirmed time block, and a reference image the artist has actually seen in advance.
Frequently asked questions
How long does a mehndi design take to apply?
A simple back-of-hand piece can take 20 to 40 minutes. A full palm mehndi design usually takes 1 to 2 hours per hand. A bridal set on both hands and both feet can take 6 to 10 hours, often split across two sittings the day before the wedding.
How dark will my mehndi design actually go?
Most stains develop to a deep orange within 12 hours and a reddish-brown within 24 to 48 hours. The final depth depends on skin type, body temperature, and how long the paste stayed in contact with the skin. Palms and soles almost always stain darker than the back of the hand or the forearm.
Can I shower with a fresh mehndi design?
It is best to avoid water for at least 12 hours after the paste is removed. After that, normal showering is fine, though long hot baths and exfoliating scrubs will shorten wear time. Pat the area dry rather than rubbing it.
Is black mehndi safe?
No. “Black henna” usually contains paraphenylenediamine, or PPD, a synthetic dye that can cause severe allergic reactions and lifelong skin sensitisation. A safe mehndi design is reddish-brown, never black, and it never stains the skin in minutes.
How do I make my mehndi design last longer?
Leave the paste on for as long as practical, scrape rather than wash, seal with a sugar-lemon balm or coconut oil, avoid water for the first 12 hours, and keep the area warm. Avoid chlorinated pools, exfoliating scrubs, and rough towels, all of which shorten wear time.
What is the difference between Indian and Arabic mehndi design?
Indian mehndi design is dense, fine-line, and symmetrical, often filling the entire palm. Arabic mehndi design uses bolder outlines, larger floral and leafy shapes, and more visible skin between the motifs. Most modern pieces combine elements from both families.
Can I do a mehndi design at home?
Yes, for simple patterns such as a wrist cuff, finger chain, or basic mandala. Use a ready-made cone with a fine tip, work on a clean dry surface, and keep the design small to start. Fine jaal and full-palm compositions are difficult without practice and a steady seated posture.
What should I do if my skin reacts to a mehndi design?
Wash the area with mild soap and water, remove any remaining paste, and stop using the product. If the reaction is more than a mild itch, contact a clinician and, if possible, share the ingredient list. Reactions to natural henna are uncommon; reactions to “black henna” and to essential-oil-heavy pastes are far more frequent.
How do I choose an artist for a bridal mehndi design?
Look at a portfolio of completed bridal pieces rather than highlight photos, ask how long the sitting will take, and confirm whether the artist offers a return visit for touch-ups after the first stain develops. A clear conversation about pattern family, scale, and timing is more useful than a long list of reviews.
Can a mehndi design be removed early if I change my mind?
It can be faded faster by soaking the area in warm water and gently exfoliating, but the stain cannot be removed instantly. If a quick change is needed, a mehndi design on a less visible area such as the sole of the foot is easier to hide during the fade-out period than one on the back of the hand.