November 6, 2026 / Studio Practice
FH6 Barn Find Map: Locations, Stamps, and How to Unlock Every Car
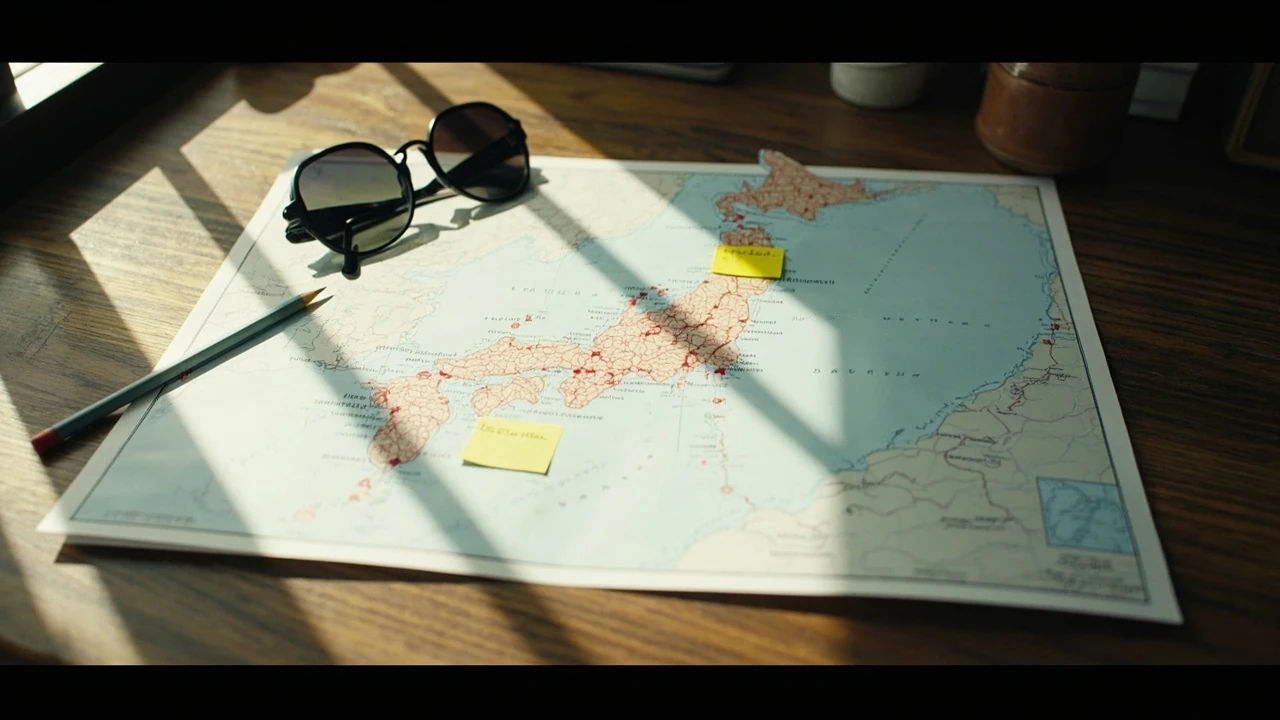
FH6 barn find map: locating every classic across Japan
Forza Horizon 6 trades the series’ usual open highways for a stylised version of Japan, and that change reshapes one of the franchise’s oldest collectible systems. There are 15 Barn Finds in FH6, each locked behind a stamp you earn by completing Discover Japan activities in the Collection Journal. The barn itself only becomes accessible after the relevant stamp category unlocks, and each car then takes a set amount of real-world time to restore before it can be driven. That two-step gate is the reason a reliable FH6 barn find map is worth planning around before you start chasing cars at random across the map. Players who treat the system as a checklist usually end up retracing the same roads, while players who treat it as a timeline tend to keep the garage moving without long dead stretches.
This guide treats the barn find system as the resource-management puzzle it actually is. It walks through how the map is structured, how stamps gate each car, what the confirmed restore windows look like, and how to plan a route that respects the game’s pacing rather than fighting it. Where the only verifiable source is the IGN wiki page for Forza Horizon 6 Barn Finds, the article stays inside what that page supports and marks the rest as planning logic or community observation. The aim is to give a working map you can update as new cars are confirmed, rather than a frozen snapshot that goes stale the moment the studio updates the roster.
How the FH6 barn find system works
Barn Finds are one of three collectible car families in Forza Horizon 6, sitting alongside Treasure Cars and Aftermarket Cars. Treasure Cars are abandoned vehicles tied to a board, Aftermarket Cars are earned through tuning and upgrade goals, and Barn Finds are the series’ classic hidden-in-a-building style. In FH6 those buildings are spread across the map of Japan and contain old relics, abandoned automobiles, and classic cars, the wording used by the developer’s own descriptions. What makes FH6 different from earlier entries is that the barn is no longer free to open the moment you drive near it. The car is gated behind a stamp, and stamps are earned through the Collection Journal.
That stamp gate is the central mechanic. The Collection Journal tracks Discover Japan activities, which are a mix of driving, exploration, and event tasks tied to different facets of the location. Each time you finish enough activities in one category, the relevant stamp unlocks, and the stamp in turn unlocks a specific Barn Find. Once a Barn Find is unlocked, you still have to drive to the barn, locate the building, and trigger the discovery. After that, the car enters a restore timer that runs in real time, not in-game time, which means you cannot shortcut the wait by sleeping in a hotel or changing the in-game clock. The system is closer to a slow-moving production line than a scavenger hunt, and the FH6 barn find map is the production schedule.
Two practical consequences follow from that design. First, the order in which cars become available is partly fixed by the order in which the studio expects players to complete stamp categories, so the route across Japan is not purely player-driven. Second, the restore timer creates a backlog in the garage, and that backlog shapes how much time is worth investing in new stamps during any given session. Together, those two consequences make a static map far less useful than a working one. The barns themselves rarely move, but the conditions that unlock them do.
Why the FH6 barn find map is different from earlier games
Earlier Forza Horizon games put barns on the map from the start and let players find them in any order. FH6 reverses that design. You cannot get a Barn Find until the relevant stamp is unlocked, which means the order in which cars become available is fixed by the Collection Journal, not by your driving route. For players who prefer to plan, this turns the FH6 barn find map into a timeline rather than a checklist. The question stops being “where is the closest barn?” and becomes “which stamp should I be working on right now, and which car will that stamp unlock?”
The change also changes the value of a map. In older games, a community map saved hours of driving; in FH6, it saves hours of stamp grinding. The map still matters, because you have to know which region to drive to once a car unlocks, but the bottleneck is the activity loop that produces stamps, not the location of the barn itself. A player who ignores the journal will see barns they cannot enter for hours, and a player who ignores the map will waste stamps on cars that are not yet accessible.
There is also a quieter shift in how the discovery moment feels. In earlier games, finding a barn was the surprise; in FH6, the stamp is the surprise, and the drive to the barn is the confirmation. The map is the part that smooths that confirmation into something you can plan a session around, instead of a half-hour detour that breaks whatever event you were in the middle of running.
Stamp categories and the collection journal loop
The Collection Journal groups Discover Japan activities into categories, and each completed category contributes to a stamp. Categories generally follow the kind of place a player is exploring. Driving categories reflect road-based achievements, exploration categories cover finding landmarks and hidden areas, and event categories tie to seasonal or festival content. The exact list of categories is updated as the live team adds new content, so the most reliable approach is to treat stamps as a moving target rather than a fixed list.
A practical planning approach looks like this:
- Open the Collection Journal at the start of every session and check which categories are close to completion.
- Prioritise activities that finish off near-complete categories, because each completed stamp is more valuable than partial progress in a new one.
- Note which Barn Find the next stamp will unlock so you can plan a route to that region immediately after it unlocks.
- Avoid spending long sessions on activities that do not advance any category, because the time spent there is invisible to the Barn Find loop.
This loop is the gating layer that the FH6 barn find map sits on top of. Once the stamps are running, the map becomes useful as a routing tool rather than a checklist. The two systems depend on each other: stamps without a map leave you driving in circles, and a map without stamps leaves you parked outside locked barns.
For players who bounce between solo and online play, the journal behaves the same in both modes, but the activity mix tends to differ. Solo sessions lean toward exploration and road-trip tasks, while online sessions push event and festival tasks. The stamp categories are wide enough to absorb both, so the journal is one of the few parts of the progression system that does not punish mixed play styles.
Confirmed FH6 barn find locations and their stamps
The verified public source for Barn Find locations is the IGN wiki page for Forza Horizon 6 Barn Finds, which tracks the cars as the studio confirms them. The list below summarises the cars that page currently supports with confirmed regions and stamped requirements. Where the page has not yet confirmed a specific car, that car is omitted rather than guessed.
| Barn Find car | Region | Approximate area | Stamp category | Restore time |
|---|---|---|---|---|
| Honda 2005 NSX-R GT | Ohtani | Near the river running south through the region | Driving | About 1 to 2 real-world hours |
| Ford Sierra 1987 Cosworth RS500 | Ito | Forest on the southern edge of the region, off the corner road | Exploration | About 1 to 2 real-world hours |
| Toyota 1969 2000GT | Ito | Ito region, specific route to be confirmed | To be confirmed | To be confirmed |
Twelve more Barn Finds are listed in the wider page but have not been individually confirmed in the public excerpt used for this page. Treat their regions and stamps as placeholders until the studio updates the wiki or the in-game journal. A common planning mistake is to assume that all 15 cars follow the same short restore window; the verified page already notes that some cars take a few hours and others can take entire weeks to restore, so the actual spread is much wider than the first two cars suggest. The 2000GT is a useful example of that uncertainty. The car is confirmed as a Barn Find in the Ito region, but the page does not yet lock down a specific area, stamp, or restore window, so it is the kind of entry a working map should keep marked as unconfirmed until the studio updates the source.
Walking through a single Barn Find route
The Honda 2005 NSX-R GT is the clearest example of how a Barn Find route actually plays out once the stamp unlocks. The car sits in the Ohtani region, near the river that runs to the south. The driving approach matters as much as the destination, because barns are deliberately placed off the obvious road.
- Head to the curvy road to the east of the river, where the road bends into two hairpin turns.
- From the hairpins, look for a dirt path that branches off the tarmac and starts climbing the hill.
- Follow the dirt path uphill until the building becomes visible, then trigger the discovery by driving close enough for the prompt to appear.
- Confirm the car in the barn, then leave the area and let the restore timer run in the background while you keep playing.
The Ford Sierra 1987 Cosworth RS500 follows a similar shape but a different texture. It is found on the southern edge of the Ito region, in a forest that sits in the corner of the map. The forest setting is significant, because tree cover hides the building from the air and breaks line of sight, which is one of the reasons a printed or screenshot map helps more than driving around with no reference. The approach road is the corner road that runs along the edge of the region, and the barn itself is reached by cutting south into the trees once the road bends away from the corner.
Both routes share three features that show up across most Barn Finds in the game. The destination is a building, not an open car, so it has to be approached on the ground. The road to the building is rarely the main highway, which is why the map has to mark the side roads, not just the region. And the final stretch is almost always a dirt or gravel path, which means a car with decent off-road grip is more useful than a high-power road build for the last hundred metres.
Restore times and what they mean for session planning
Restore times in FH6 are real-world hours, not in-game minutes, and the spread between the shortest and longest cars is large. The two confirmed cars in the public source both restore within one to two real-world hours, which is fast enough to fit inside a single play session if you trigger the discovery early in the evening. The wider page warns that other cars can take entire weeks, which means the system is designed to keep at least one Barn Find in progress at all times for a long-term player. A working map needs to track the restore column as carefully as the stamp column, because a row of cars that are all mid-restore is as useless as a row of cars that are all locked.
| Restore window | Planning impact | Typical session shape |
|---|---|---|
| 1 to 2 real-world hours | Car ready by the end of a long session | Trigger discovery, run a different event, come back for the car |
| Several hours | Car ready the next day or the day after | Trigger discovery in the evening, drive the car the following morning |
| Up to several weeks | Car is a long-term project, not a short-term goal | Trigger discovery and rotate other cars in and out while it restores |
The practical lesson is to avoid triggering every Barn Find the moment it becomes available. If you open all 15 in one weekend, the fastest cars restore first and the slowest cars sit in your garage for weeks, blocking you from triggering them again. Staggering discoveries, the way the system seems to expect, keeps the garage moving and lets you keep earning stamps for the next car while the previous one is still in the workshop. A good rule of thumb is to keep at most two or three cars in restore at any one time, so the workshop does not turn into a parking lot.
There is also a hidden cost to long restore times that does not show up on the map. While a car is in restore, it occupies a slot in the garage that could be used for a freshly restored car. Players who ignore that constraint often end up with a long list of cars they technically own but cannot drive, because the slower cars are still in the queue. The fix is the same as the fix for the stamp bottleneck: keep the system moving, and only trigger a new Barn Find when there is room in the workshop for the result.
Building your own FH6 barn find map
A good player-side map is not a copy of the world map. It is a working document that ties stamps to regions so you can react the moment a new car unlocks. The structure below is the minimum a useful map needs to keep the system legible.
- One row per Barn Find, with the car name, region, and the stamp category that unlocks it.
- One column for the current stamp progress, updated each session based on the Collection Journal.
- One column for the discovered or undiscovered state, so you can tell at a glance which barns still need a physical visit.
- One column for the restore time, used to plan when the car will actually be drivable.
- Optional notes column for the approach route, especially for barns hidden behind hairpins or off dirt paths.
This shape works whether you keep the map in a spreadsheet, a notebook, or a phone note. The point is the same: keep the stamp, the location, and the restore window in the same place, so the next time a stamp unlocks, you already know which region to drive to and how long the resulting car will sit in the garage. A map that tracks only one of the three columns tends to drift, because the system depends on all three columns moving in step.
For players who prefer a visual map, the same structure can be drawn over a screenshot of the in-game world map. Mark the barns with their car names, the stamp category, and a small clock symbol for the restore window. The visual layer is useful for the drive to the barn, while the table layer is useful for the stamp and restore planning. Keeping both versions in sync is the main upkeep task, and a short end-of-session check is enough to keep them aligned.
Common mistakes when chasing Barn Finds
Even players who read the FH6 barn find map carefully can lose hours to a small number of recurring errors. The list below is drawn from the way the system is described, not from invented play sessions.
- Driving to a barn before the relevant stamp is unlocked. The barn is gated, and the prompt will not appear until the stamp drops.
- Triggering every available Barn Find at once, which piles up long restore timers and stalls the garage.
- Confusing Treasure Cars with Barn Finds. Treasure Cars use a different board and a different discovery flow, and chasing them as if they were Barn Finds wastes time on the wrong system.
- Assuming the restore timer responds to in-game time changes. It does not, and changing the in-game clock will not shortcut the wait.
- Ignoring the Collection Journal between sessions, which leads to stamp progress that is invisible until a category suddenly completes.
Avoiding these five errors saves more time than any single routing trick. The Barn Find loop is short on steps, and each step has a clear consequence when it is skipped. A player who builds the habit of checking the journal first, staggering discoveries, and keeping the map updated will find the system far less frustrating than a player who treats each barn as an isolated side trip.
How FH6 Barn Finds fit the wider collectible car loop
Barn Finds do not stand alone. They are one of three parallel car sources, and each one feeds a different part of the Forza Horizon 6 experience. Treasure Cars are about exploration and reward you for finding specific vehicles in the open world. Aftermarket Cars are about tuning and progression, and reward you for sticking with a build through upgrades and events. Barn Finds are the slow burn. They are the cars that you plan around, because the stamps gate them and the restore timers pace them.
For players who like the franchise’s older rhythm of stumbling across a barn during a long road trip, the new system is a real change. The discovery still happens at a building, but the path to that building is now a multi-step process that includes activity grinding, journal tracking, and restore waiting. The FH6 barn find map is the tool that keeps that process honest, and the Collection Journal is the activity layer that the map depends on. Used together, they replace the older feeling of luck with something closer to a production schedule, and for many players that trade is worth making.
What to track between sessions
Because the system rewards consistency over burst play, a short end-of-session check is worth more than a long grind. The minimum useful check is short enough to fit in a minute.
- Open the Collection Journal and note which stamp categories are close to completion.
- Update your Barn Find map with the latest stamp progress.
- Mark any barn that you have discovered but not yet picked up, so you do not re-trigger the discovery by accident.
- Note any car whose restore timer is about to end, so you can plan the next session around picking it up.
That four-step check is enough to keep the loop legible across days or weeks. It also produces a paper trail that is useful when new content is added, because you can see at a glance which categories you have already completed and which ones you still need to chip away at. Players who skip the check usually find that the map has gone stale, and that the gap between their last note and the current state of the journal is wider than they expected.
How the map helps with new content drops
Forza Horizon 6 is designed as a live game, which means new Barn Finds, new stamp categories, and new regions can all show up between major updates. A working map is the easiest way to absorb that change without restarting the planning from scratch. When a new car is announced, the first task is to look up its region and stamp category in the source page, then add a row to the table with the same column structure as the rest. The visual map gets a new marker, the table gets a new entry, and the existing rows are unchanged.
The same approach works when a new stamp category is added. The new column is added to the Collection Journal loop, and the existing rows are checked for cars that might be tied to the new category. If a car is now confirmed as belonging to the new category, its stamp column is updated and the entry moves from unconfirmed to confirmed. If no car is yet tied to the new category, the category is added to the planning notes without changing any of the existing rows. Either way, the map grows without losing the structure that made it useful in the first place.
What is still unconfirmed about the FH6 barn find system
The IGN wiki page for Forza Horizon 6 Barn Finds is the most concrete public source at the time of writing, and even it notes that some entries are still being confirmed. Twelve of the fifteen Barn Finds are not yet supported by specific region and stamp data in the verified excerpt, and the wider community discussion around restore times for those cars is still moving. A few specifics to keep in mind:
- The exact stamp category for the Toyota 1969 2000GT and the rest of the unconfirmed cars is not yet public.
- Restore windows for the slower cars are described qualitatively, not as a precise hour count, so treat any number outside the 1 to 2 hour range as provisional.
- The interactive map on the source page is the most reliable visual reference, and any player-side map should be checked against it before a long route is planned.
The honest summary is that the system is partly solved. The first few Barn Finds are clear, the gating mechanic is confirmed, and the restore timer pattern is described well enough to plan around. The remaining twelve cars will become clearer as the studio confirms them, and a working FH6 barn find map is something you can keep updating as that confirmation arrives. A player who treats the map as a living document will get more out of the system than a player who treats it as a finished checklist, because the system itself is still in motion.
Why the map still matters even with a stamp gate
It is tempting to assume that a stamp gate makes a map unnecessary, because the game is already telling you which car to chase next. In practice, the map still matters for three reasons. First, the stamp tells you which car is next, but not where that car is, and the drive to the barn is the part of the loop that the map handles best. Second, the restore timer is invisible in the journal, so the map is the only place where the garage backlog is visible at a glance. Third, the approach route to the barn is the part of the loop that the journal does not describe, and that is exactly the part that costs the most time when it goes wrong.
For those reasons, the FH6 barn find map is best treated as a single document that holds the stamp state, the location, and the restore window. Splitting those three columns across separate tools is a common source of confusion, because the columns drift out of sync the moment one of them is updated. Keeping them in the same place is the simplest way to make sure that the next time a stamp drops, the rest of the map is already aligned with it.
A short example of how a session uses the map
To make the loop concrete, it helps to walk through a single session. The player opens the journal and sees that the Driving category is one activity away from completion. They check the map and see that the Honda 2005 NSX-R GT is tied to the Driving category and lives in Ohtani. They run the activity, the stamp drops, and the NSX-R GT becomes available. They switch to the map’s location column, drive to Ohtani via the curvy eastern road, follow the hairpins to the dirt path, and trigger the discovery. They update the map to mark the barn as discovered, then leave the area and let the restore timer run. The whole sequence, from opening the journal to driving away from the barn, fits inside a single evening.
The same shape works for the slower cars, with one difference: the restore column on the map is updated with a note about the expected window, and the next session is planned around the time the car is expected to be ready. The map becomes a small project tracker, with one row per car and one column per stage. Over a few weeks, the table fills in, the visual map gains markers, and the Barn Find loop stops feeling like a side activity and starts feeling like a long-running build.
Frequently asked questions
How many Barn Finds are there in FH6?
There are 15 Barn Finds in Forza Horizon 6, spread across the entire map of Japan. The full list is still being confirmed by the studio, and not every car has a public location yet.
Why can I not enter a barn in FH6?
You cannot get a Barn Find until the relevant stamp is unlocked. Stamps are earned by completing Discover Japan activities in the Collection Journal, and each stamp category is tied to a specific car. The barn will not open until that stamp drops.
How long does a Barn Find take to restore in FH6?
Restore time is measured in real-world hours, not in-game time. The two confirmed cars both restore in about one to two real-world hours, but the wider system includes cars that take several hours and others that can take entire weeks to restore.
Can I speed up a Barn Find restore by changing the in-game clock?
No. The restore timer runs in real time and is not affected by in-game time changes. Skipping a hotel stay or changing the in-game clock will not shorten the wait.
What is the difference between a Barn Find and a Treasure Car?
Barn Finds are hidden in buildings, gated behind Collection Journal stamps, and restore in real-world time. Treasure Cars are abandoned vehicles found through a different board and discovery flow, and Aftermarket Cars are earned through tuning and upgrade goals. The three systems run in parallel and do not share progress.
Where is the Honda 2026 NSX-R GT in FH6?
The Honda 2005 NSX-R GT is in the Ohtani region, near the river that runs to the south. From the curvy road to the east, follow the hairpin turns until you spot a dirt path branching off the tarmac, then follow the path uphill to the barn.
Where is the Ford Sierra 1987 Cosworth RS500 in FH6?
The Ford Sierra 1987 Cosworth RS500 is on the southern edge of the Ito region, inside a forest that sits in the corner of the map. The forest cover hides the building from the air, so plan the approach from the closest road rather than from a high viewpoint.
Should I trigger every Barn Find as soon as it unlocks?
No. Staggering discoveries keeps the garage moving, because the slowest cars sit in the workshop for weeks. Trigger one or two cars at a time and let the restore timer run while you keep playing the rest of the game.
Does the Collection Journal reset between seasons or events?
No. The Collection Journal persists across the campaign, and stamp progress is not reset by seasonal or event content. New content can add new categories, but existing progress carries over.
Where can I find a reliable FH6 barn find map?
The interactive map on the IGN wiki page for Forza Horizon 6 Barn Finds is the most reliable public reference and is updated as the studio confirms each car. A printed or screenshot copy of that map, combined with your own stamp progress notes, is the most useful working version.