September 17, 2026 / Studio Practice
God of War Ragnarok walkthrough: a designer’s field companion
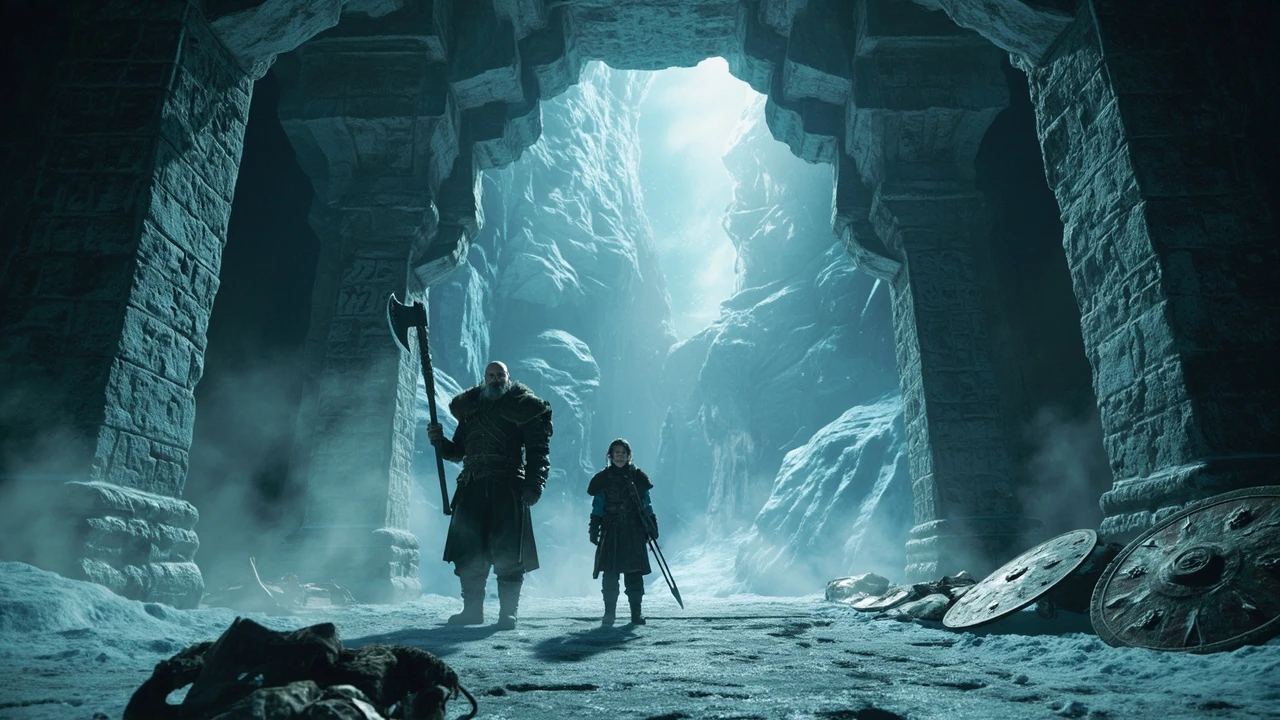
God of War Ragnarok walkthrough: planning your journey through the Nine Realms
Ragnarok is a 25 to 40 hour single-player action role-playing release from Santa Monica Studio. It opens with a winter hunt in Midgard and then pushes outward into a multi-realm campaign built around Kratos, his son Atreus, and a roster of companions that rotates by chapter. The God of War Ragnarok walkthrough below is organized so that you can move through the main story without losing side content, so that boss preparation and gear upgrades are explained in the order you actually meet each fight, and so that exploration choices and difficulty decisions are tied to the mechanics that govern them rather than to vague advice.
Rather than cataloguing every chest, this walkthrough points at the decision points that change how the campaign feels: when to detour, which favors to spend, which runic attacks to bring into a given fight, and how to read the game’s difficulty settings so the challenge matches your tolerance. The structure is also useful for editors and designers who want to study how Santa Monica Studio paces progression, gates optional content, and uses environmental storytelling to teach new mechanics without breaking narrative momentum.
Choosing a difficulty and knowing what the settings actually change
Ragnarok offers four main difficulty presets plus a custom slider, and the walkthrough is more useful when you know what each preset is doing under the hood before you commit. The presets are not a single damage multiplier. They also tune how aggressively enemies attack, how often they block, how forgiving the parry window feels, and how quickly the game drips resources. The default “Give me a story” experience is generous with health, reduces incoming damage, and gives enemies predictable combos so that the narrative carries the pace. “Give me a balanced experience” is the canonical campaign preset, and it is what most guides, including speedrun notes, assume when they reference enemy health and damage. “Give me a challenge” increases incoming damage and tightens enemy patterns, and “Give me God of War” is a punishing preset that demands mastery of parries, runic cooldown management, and the full moveset across both weapons.
Beyond the presets, the custom mode lets you scale individual axes such as enemy aggressiveness, parry window, incoming damage, and the rate at which the game grants resources. If you want a combat-heavy walkthrough experience without one-shot deaths, scaling damage down and keeping aggressiveness high tends to feel closer to a Souls-style encounter than the balanced preset does. If you are playing for the first time and only want to see the story, drop incoming damage to a low value and leave parry timing at default so that defensive mechanics still feel meaningful when they appear in late-game fights, especially against the bosses that rotate in elemental phases.
One practical note: difficulty affects which gear is actually required. On balanced and lower, you can clear most story fights with level-appropriate gear and a single fully upgraded weapon. On the harder presets, you will want to engage with the runic attack system, the relic slot, and the Spartan Rage meter, all of which the walkthrough returns to as you progress through the main chapters. Players who are coming back to the series after a long break should also be aware that the 2022 release rebalanced several 2018 mechanics, so a loadout that felt safe in the previous game will not necessarily translate cleanly here.
Core mechanics every walkthrough reader should internalize
Three systems shape almost every encounter in Ragnarok: the runic attack and summon system, the Spartan Rage resource, and the realm-shift mechanic tied to stun states. The walkthrough assumes a working understanding of each before it talks about specific encounters.
- Runic attacks and summons are socketed abilities on light and heavy runic slots for your weapons, and a third slot is tied to the amulet. They trigger on light or heavy attacks and have cooldowns. They are the most reliable way to break boss poise and are central to the build the walkthrough recommends in the late game, because they let you convert a short opening into a long stagger.
- Spartan Rage is a regenerating meter. Activating it turns Kratos into a damage-dealing juggernaut that regains health from hits. The walkthrough treats Rage as a panic resource and a burst-damage tool, not as a primary damage source, except in scripted moments where the game grants it for free as part of a story beat.
- Realm shift is a temporary bullet-time state that triggers when you fully deplete an enemy’s stun bar. The walkthrough treats it as a window for heavy attacks, runic activations, and safe repositioning rather than a window to be saved for emergencies, because most late-game bosses will not give you a second chance once the phase transitions.
These three systems layer on top of the familiar Leviathan Axe and Blades of Chaos combo structure. The walkthrough does not assume you have the muscle memory of the 2018 game; it calls out new input rules, such as the way runic cooldowns reset on a small set of weapon-specific procs, only at the chapter where the mechanic first matters. There is also a parry timing change that is easy to miss: a successful parry on a heavy attack now refunds a small amount of Rage, which is the most reliable way to keep the meter topped up on the harder presets.
Story path: how to move through the main chapters without losing your place
Ragnarok is broken into roughly six narrative arcs that map to in-game labels like “The Quest for Tyr” and “Ragnarok.” The walkthrough is structured around these arcs because each one introduces a region, a companion, or a new gameplay system, and because the recommended order of side content shifts between arcs. Within an arc, the path is generally linear, but the game frequently offers a “favor” or side quest that branches from a main objective, and the walkthrough flags the moment when a detour is worth taking versus the moment when it is more efficient to push the main quest forward and return later. The arcs also have a soft pacing curve: the early arcs are short and dense, the mid-game arcs open up the realm graph, and the final arc is heavily scripted and short by comparison.
The table below summarizes the chapter order, the companion who travels with you for the majority of the arc, the dominant new mechanic the chapter introduces, and the rough point at which the chapter’s main story content becomes available on the recommended difficulty. The companion column matters because some gear and ability upgrades are gated to specific companions returning to the hub, and the walkthrough ties side activities to the arcs where they unlock.
| Story arc | Primary companion | New mechanic introduced | Recommended main quest completion |
|---|---|---|---|
| Surviving Fimbulwinter | Atreus | No new core system; sets the tone and pacing | Early, before the first major realm shift |
| The Quest for Tyr | Atreus, then Brok and Sindri | Companion-led puzzles and grappling point traversal | Mid-arc, with multiple branching paths |
| Old Friends | Freya (controlled segments) | Companion control swaps and unique ability loadouts | Mid-game, used to vary combat pace |
| The Reckoning | Atreus, with rotating companions | Gear sets and runic attack upgrade trees | Late mid-game, primary upgrade phase |
| The Path | Varied by quest | Realm travel and resource conversion at the hub | Late-game transition chapter |
| Ragnarok | Varied, mostly narrative | Final story fights and concluding dungeon sequences | End-game |
You do not need to finish every side activity within each arc, but the walkthrough recommends completing any companion-specific favors that appear in the same hub as the current arc’s story finale. The reason is mechanical: completing those favors unlocks a new piece of gear or a crafting tier from the companion’s shop, and that gear is what the next arc assumes you have access to. There is also a softer reason: the favors are where the quieter character writing lives, and several of them are referenced again in late-game dialogue, so skipping them can leave small story beats feeling oddly thin. For a concise background reference on the release, the Wikipedia article covers the production, setting, and reception in more detail.
Boss fights: preparation, phases, and what the game does not tell you
Every major boss in Ragnarok follows a pattern the walkthrough uses throughout: a learnable opener, a phase transition triggered by a stagger or a cinematic break, and a finisher phase where the arena changes or the boss gains a new element. The walkthrough breaks each major fight into three checkpoints, which is more useful than a long list of attack windows because the checkpoint structure mirrors the way the game itself signals difficulty. Where a standard boss list is helpful, the table below covers the most-missed story fights and what you should bring to them. Readers who want more background on God of War Ragnarök can use the Wikipedia article while reviewing this point.
| Story boss | Approximate recommended level | Suggested weapon focus | Stagger strategy |
|---|---|---|---|
| The Huntress | Matches main quest gate | Blades of Chaos for area control | Runic attacks during her ranged phase |
| Thor (first meeting) | Two to three levels above gate | Leviathan Axe for parry timing | Realm shift after fully depleting the stun bar |
| Heimdall | Match gate, lean on dodges | Whichever is most upgraded | Parry the counter windows; use Spartan Rage to bait out the second phase opener |
| The King (Midgard) | Two levels above gate on hard | Blades for burn uptime | Use runic summon during the second transition |
| Final story bosses | Often a soft gate, not a hard level | Whatever your highest-tier build uses | Save Rage for the final phase opener; rely on Realm shift for the finisher |
Two practical rules apply across the entire list. First, the walkthrough treats the stun bar as the most important thing to learn because Realm shift is the most reliable damage window in the game, and any gear that buffs runic attacks is disproportionately valuable on bosses with a single staggered phase. Second, the walkthrough recommends spending Hacksilver on armor rather than weapon upgrades for the first half of the campaign, because most story bosses hit the armor’s defense and resistance thresholds before they hit the weapon’s damage curve. The standard mistake is to pour resources into weapon damage early and then find that late-game bosses ignore a chunk of physical damage because of armor debuffs, leaving the player to backtrack into a crafting tier they should have been investing in all along.
It is also worth noting that a few bosses have a hidden resistance to one weapon type for narrative reasons. The game does not flag this in the UI, and it is the most common reason players report a fight “not working” even when their level is correct. If a fight is taking noticeably longer than the recommended time, switch weapons before changing difficulty, and re-check the stagger bar: the boss is probably designed to be broken by the other weapon’s element.
Exploration, favors, and side content: when to leave the critical path
Ragnarok’s side content lives in three layers: favors, which are short story-lite quests issued by named NPCs; collectible sets, which include things like artifact sets, mystic gateway pieces, and legendary chests; and realm-specific activities such as the Berserker Gravestones and the optional dungeon bosses. The walkthrough groups these layers because they reward you at different scales. Favors give narrative payoffs and usually unlock a small reward, collectible sets give crafting materials and cosmetics, and the named gravestones and dungeons give some of the strongest non-story gear in the game, including several pieces that are effectively required to clear the post-credits sweep on the harder presets.
The general rule the walkthrough follows is to clear favors as they appear, sweep a region’s collectible set within one or two chapters of the region opening, and save the hardest optional content for a single late-game sweep when your build is at its strongest. Trying to clear every Berserker Gravestone as you find it is one of the most common ways to plateau, because the early-game ones are not worth the resources you spend on consumables, and the late-game ones expect fully upgraded gear plus a working knowledge of the boss’s elemental phase.
- Pick up a favor when its giver is standing in the same hub as your current story objective; the walkthrough treats this as a no-cost detour because you are already there, and the return trip is built into the fast travel points you will unlock anyway.
- Sweep a collectible set once, then move on. Backtracking for one chest the game points you toward is a reliable way to lose time, and the walkthrough prioritizes a single clean sweep over repeated returns.
- Hold the hardest optional content for the end of the current arc. By the time you finish an arc, your runic attacks and armor set should be leveled enough to clear the toughest gravestones without the resource tax they would have charged at the start of the arc.
- Use the realm travel room at the hub to convert resources you do not need into the ones you do. The walkthrough’s default is to keep one stack of common resources on hand and convert the rest, because the resource economy is tuned around having a buffer rather than a stockpile.
These rules are not the only way to play, but they line up with the pacing of the main campaign: you should always be slightly above the level the next story chapter expects, rather than well above it, because being too far above the level gate trivially reduces a fight that is supposed to introduce a mechanic. That mechanic is the point of the chapter, and skipping it tends to leave late-game content feeling arbitrary rather than earned.
Gear, runic attacks, and build direction by chapter
Ragnarok’s loot is structured around armor sets, runic attacks, amulet slots, and a small number of relic-type items that slot into a single slot. The walkthrough recommends treating the armor set as your core identity and rotating runic attacks as you find stronger options, rather than chasing the highest single piece of gear. The reason is that armor set bonuses scale the more pieces you wear, and the game is balanced around a coherent three-or-four-piece bonus plus a pair of runic attacks tuned to a single damage type. Mixing two sets at two pieces each usually feels worse than a partial set of one, because the bonus math does not line up with the rest of the build.
For the early game, the walkthrough recommends focusing on whatever set you unlock from your first major story reward and pairing it with a single runic attack that produces a consistent area-of-effect, because most early bosses are weak to sustained pressure rather than burst. For the mid game, the recommendation shifts to a cooldown-focused build, where you bring two runic attacks with short cooldowns and rely on Realm shift to keep the rotation tight. For the late game, the recommendation is to use the runic summon slot for a fast-acting summon and to bring a long-cooldown heavy runic as your finisher, because the late-game bosses are designed to punish slow, predictable rotations and reward players who can convert a single stagger into a full combo.
- Early game: Wear a matched set, lean on a single area-of-effect runic, save Rage for emergencies, and avoid the temptation to spend resources on cosmetics.
- Mid game: Mix a defense-oriented chest piece with two offensive pieces from a damage set, bring two short-cooldown runic attacks, and start using Rage as a burst tool rather than a heal.
- Late game: Run a fully upgraded set with the strongest set bonus you have unlocked, slot a fast summon and a heavy runic, and use Spartan Rage as a deliberate damage window rather than a heal, because late-game bosses rarely give you a second stagger to work with.
The walkthrough also flags the amulet slot as a free damage multiplier once you unlock the ability to engrave it. Engraving a single stat such as strength or runic is a stronger return than a half-finished spread, and the walkthrough’s default is to commit one amulet to a single role for the entire campaign. Players who want a second look at how the runic system was previewed before launch can read the independent write-up of the ragnarok teaser for some context on the system’s design lineage.
Realm travel, puzzles, and the design logic behind the pathing
Realm travel is the most important new structural feature in Ragnarok, and the walkthrough treats the realm hub as the main menu for the second half of the game. The hub is not just a fast travel point; it is the only place where the game allows you to convert resources, engage with a small set of hub-only vendors, and re-equip before a difficult fight. Once you understand the hub, the pathing of the main story stops feeling like a series of disconnected dungeons and starts feeling like a single resource graph that you can move through in the order you prefer. The hub also acts as a save anchor: the game autosaves at the hub more consistently than at any other location, which matters on the harder presets where a single death can cost ten minutes of progress. Readers reviewing god of war fans may have found another 'ragnarok is coming' tease can use the verified article for additional context on this point.
Realm travel also unlocks the seed slots that gate the heaviest optional content. The walkthrough recommends unlocking at least one mid-tier seed slot in each of the four main realms as soon as the travel room allows, because doing so unlocks a set of fast travel points that make the rest of the side content much less painful. The puzzle mechanics, including the new spectral light mechanic and the realm-specific runic doors, are designed to teach by repetition; if you find yourself stuck on a puzzle, the walkthrough recommends walking away and returning with a clearer head rather than looking up the solution, because the same family of puzzles recurs across multiple realms and the solution becomes intuitive after two or three attempts. That repetition is deliberate, and it is one of the reasons the mid-game can feel slow on a first playthrough even when the underlying level design is dense.
It is also worth understanding the soft gating that the realm travel room introduces. Some seed slots are visible but cannot be activated until the relevant companion has reached a certain story point, and the game does not always explain this. If a slot is glowing but will not activate, the walkthrough recommends pushing the main quest one chapter further before returning, because the slot is almost certainly waiting on a story trigger rather than a missing resource.
What a “100 percent” run actually requires
Players who want to clear everything in a single playthrough should plan for an extended playtime that goes well beyond the 30-hour average. The bulk of the extra time is in the Berserker Gravestones, the optional dungeon bosses, the artifact sets, and the favor content that requires you to return to a hub after several story chapters. A useful framework is to separate completion into three rings: story content, side content that becomes available during the story, and content that only unlocks after the main story is complete. The walkthrough clears the first two rings in a single campaign and reserves the final ring for a clean post-credits sweep, because that final ring often depends on late-game crafting tiers that you can only access after the story gives you a specific resource.
The table below gives a planning summary. It does not assume you have the game memorized; it is a planning tool you can keep open while you play.
| Completion ring | Typical time cost | What it includes | Walkthrough guidance |
|---|---|---|---|
| Main story | 25 to 35 hours | Six narrative arcs and the main boss fights | Push forward; do not detour for the hardest gravestones yet |
| Side content unlocked during the story | 10 to 15 hours | Favors tied to current companions, mid-tier collectible sets, one or two of the easier gravestones | Clear in the same arc; it is efficient and you have the right gear |
| Post-credits sweep | 5 to 10 hours | Hardest gravestones, remaining artifacts, final dungeon boss | One clean pass after your build is fully upgraded |
Players who only want the story can stop at the credits. Players who want a confident build for the hardest content should expect to keep playing for several sessions after the credits, because the post-credits sweep is the only way to get the gear that makes the late-game gravestones feel fair rather than punishing. On the hardest preset, a fully upgraded build is closer to a requirement than a recommendation, and the post-credits sweep is where that build comes together.
Common sticking points and how to recover from them
The walkthrough flags a small number of consistent trouble spots where the main campaign can stall. The first is the realm-travel room itself, which is a soft tutorial and can be confusing on a first play because the game expects you to make a non-obvious conversion choice. The second is the first Berserker Gravestone, which is a difficulty spike and should be approached as a skill test rather than a gear test. The third is the late-game story boss who has a phase that the game does not signal clearly, and the fourth is the final dungeon’s environmental puzzle, which is intentionally obscure. None of these are bugs, and none of them require a restart; they are design choices, and the walkthrough’s job is to call them out before you hit them.
The recovery rule the walkthrough applies to all four is the same: when a fight or puzzle stops feeling like a challenge you can read, take a step back and check whether the game is asking you to use a specific mechanic. Most “stuck” moments in Ragnarok are the game waiting for you to use a tool you already have, not a hidden weakness in your build. The next time you find yourself taking the same damage twice in a row, the walkthrough recommends checking the runic cooldown and the Rage meter before changing armor: you may be one runic activation away from breaking the boss’s pattern. If that does not work, the next thing to check is your weapon matchup, because a number of late-game enemies have an explicit resistance to one of the two weapons, and the game does not surface that in the UI.
There is also a softer category of sticking point that is easy to miss: pacing fatigue. Ragnarok’s mid-game is dense, and a few players find that they stop enjoying the combat long before the story gives them a reason to push forward. The walkthrough’s recommendation in that case is to switch to a lower difficulty for a single chapter, clear a few favors, and then return to the harder preset. There is no penalty for doing so, and the story does not change, but the temporary drop in pressure often restarts the engagement loop.
Design perspective: how the walkthrough mirrors the game’s pacing logic
From a development standpoint, Ragnarok’s pacing is built on a “two small dungeons, one big dungeon” rhythm, where each arc alternates between short, high-density encounters and a longer set piece that introduces a new tool. The walkthrough mirrors that rhythm on purpose. By grouping side content around the high-density encounters, the walkthrough keeps the long set pieces feeling like set pieces, rather than letting side content dilute them. By saving the hardest gravestones for the post-credits sweep, the walkthrough respects the design team’s choice to gate the most demanding encounters behind a fully upgraded build. That gating is not arbitrary: it is what makes the hardest content feel earned rather than grueling.
This is also why the walkthrough does not front-load gear advice. The developers assume you will pick up a small set of usable items early, test them against the first major boss, and learn from the matchup which stat matters for the next arc. Front-loading a build would actually make the early game worse, because it would remove the experimentation that the level design is built around. The walkthrough’s role is to surface the right experiments at the right chapter, not to hand over a single answer at the start. That choice has a cost: the walkthrough reads as more of a pacing guide than a build guide, and players looking for a single optimized loadout will need to wait until the late-game sections. The trade is intentional, and it is what makes the walkthrough useful across multiple playthroughs on different difficulty presets.
Frequently asked questions
How long is the God of War Ragnarok walkthrough if I only follow the main story?
Following the main path on a balanced difficulty usually takes between 25 and 35 hours. The first arc runs a few hours, the mid-game arcs are longer because they include the realm-travel unlocking and several major bosses, and the final arc is shorter and denser. The walkthrough uses the main story as a baseline and treats anything beyond it as an optional layer.
What difficulty should I choose for my first playthrough?
For a first playthrough, the balanced preset is the safest choice because it teaches parry timing and runic management without one-shotting you. If you want a more relaxed story experience, lower the incoming damage in the custom slider but keep the parry window at default. The hardest preset is for players who already have muscle memory from the 2018 game or who want a serious challenge.
When should I start the Berserker Gravestones?
The walkthrough recommends starting the easiest gravestones as soon as you find them and saving the hardest for the post-credits sweep. The gravestones scale with your level, but the late-game ones also expect a fully upgraded runic rotation, which is the main reason to delay them.
Is Spartan Rage a health potion or a damage ability?
Both, but the walkthrough recommends treating it as a damage ability first. Activating Rage during a boss stagger is more efficient than activating it as a heal, because Rage regenerates over time and the heal it provides is a side effect of the damage you do during the activation.
Should I prioritize weapon upgrades or armor upgrades?
For the first half of the campaign, prioritize armor because the resistance thresholds matter more than raw damage. For the second half, shift toward weapon and runic upgrades because late-game fights expect a more aggressive rotation. The walkthrough’s default is to keep armor at the recommended level and only pour resources into weapons when a boss is hitting a stagger window you cannot break.
How do I get the most out of realm travel?
Treat the realm travel room as your central hub. Convert any resources you do not need for the current arc, unlock the seed slots as soon as the game allows, and use the fast travel points they grant to keep side content efficient. The realm travel room is the only place where you can convert between resource types, so plan around it.
Can I finish all side content before the final boss?
Most side content, yes. The exceptions are the post-credits-only resources and a small number of late-game crafting tiers that only unlock after the main story. The walkthrough recommends clearing everything except those exceptions in a single playthrough and saving the rest for a clean post-credits sweep.
What is the best way to learn boss patterns?
Take the first attempt slowly, focus on the boss’s opener, and use Realm shift windows as a study tool. The walkthrough also recommends using the parry window as a metronome: if you can parry the opener consistently, the rest of the rotation will follow. If a fight is going badly, drop the difficulty by a single tier rather than restarting from scratch, because the second attempt usually solves the pattern.
How does this walkthrough handle the post-credits content?
It treats the post-credits sweep as a single planned session, not a stream of small detours. Once the main story is done, the walkthrough clears the remaining gravestones, picks up the remaining collectible sets, and finishes any outstanding favors in a single pass, because the post-credits content is dense and benefits from a focused session.