September 22, 2026 / Studio Practice
Simple mehndi design: a practical guide to clean, beginner-friendly patterns
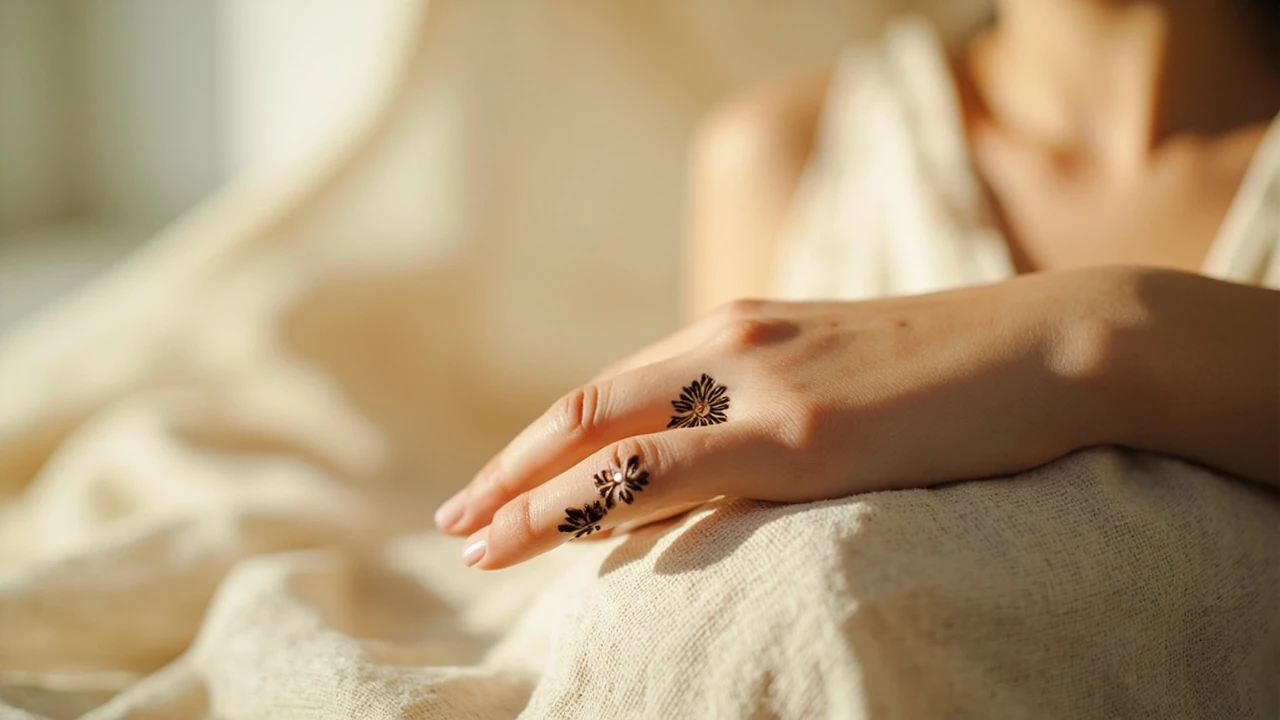
Simple mehndi design: a practical guide to clean, beginner-friendly patterns
A first attempt at henna often looks heavier than expected because the cone tip dragged, the spacing shrank, and the stain set before the corrections could be made. The patterns most people call “simple” are not the ones with the fewest shapes. They are the patterns whose shapes sit far enough apart that small wobbles disappear into the rhythm of the design. This guide focuses on that kind of simple mehndi design: the version a careful beginner can actually draw on the first or second try, and that a more experienced artist can lay down in a few minutes when a client wants something restrained for an office, a daytime event, or a child’s first application.
The approach below is deliberately procedural. You will work from the wrist toward the fingers, build a small library of motifs, and learn a few checks that keep the design balanced on either hand. There is no claim that one style is universally better than another. There is a claim that a small set of decisions, made before the cone touches skin, removes most of the awkward first-hour mistakes.
What “simple” actually means in mehndi
When a client asks for a simple pattern, the word usually covers four things at once: a short application time, a clean silhouette, patterns that read clearly after the stain oxidizes, and a shape that suits the hand it is drawn on. Length matters less than readability. A pattern with twenty small dots, two thin vines, and one central flower can feel simpler than a pattern with a single thick line because the eye understands the first design without effort.
This matters because mehndi is a temporary tattoo that changes as it dries. The paste is visible for a few hours; the stain is the part the wearer and their audience will see for one to three weeks. A pattern that looks fine in wet paste can become muddy once the paste is removed and the orange dye has oxidized into brown. Simple patterns survive that transition because they leave a small amount of clear skin between marks. That clear skin is the contrast that makes the design legible.
Tools, cone handling, and paste consistency
Most application problems start with the cone. A cone that is too tight will not release paste; a cone that is too loose floods the line. A practical test is to squeeze a 2 cm line onto the back of your own hand. If the line holds its width without bleeding and the cone feels light in the fingers, the consistency is workable.
- Use a cone with a tip opening of about 1 mm for outlines and 1.5-2 mm for fills such as petal shading.
- Hold the cone like a pen, with the index finger resting near the tip and the thumb on the opposite side for pressure control.
- Rest the side of your hand on the wearer’s hand whenever possible. A braced hand draws steadier lines than a hovering one.
- Keep a tissue folded beside the cone to wick away any bead of paste that forms at the tip before it falls onto clean skin.
- Plan to finish a single hand in 12-20 minutes for a true simple pattern. If the time is stretching past 30 minutes, the design is no longer simple.
Paste freshness also affects the final color. A cone that has been sitting for more than a few hours loses moisture, the line breaks, and the stain goes patchy. Most artists mix small batches and refill the cone two or three times per appointment rather than working from a single full cone.
Planning the layout before you draw
Layout is where simple patterns succeed or fail. A 4 cm wide cuff around the wrist, a small motif on the back of the hand, and a thin trailing line down the index and little fingers will usually look balanced on most adult hands. A pattern that tries to fill the whole hand with small shapes looks busy even when every shape is technically simple.
| Hand zone | Recommended motif size | Suggested clearance | Common mistake |
|---|---|---|---|
| Wrist cuff (4-6 cm wide) | One central motif, 2.5-3.5 cm tall | 0.5 cm from wrist crease and bracelet line | Drawing past the wrist crease, so the pattern cracks when the wrist bends |
| Back of hand | One to three small motifs, 1-2 cm each | 1 cm between motifs and from finger joins | Packing motifs close together so the stain blends after oxidation |
| Fingers | Thin lines, dots, or a single ring band | Stop 3-4 mm before the nail bed | Drawing full rings that smear against daily objects |
| Palm | Optional single line or small dot cluster | Avoid filling creases; let the palm stay mostly bare | Heavily filling the palm, which fades fastest and looks uneven |
The clearance column is the part beginners skip. Skin moves. A motif drawn over a joint will stretch and crack. A motif drawn close to the nail bed will rub off against phone screens and bags. Treat those clearances as part of the design rather than empty space.
Core motifs for a simple mehndi design
You can build a wide range of patterns from a small set of reliable shapes. The shapes below are common in South Asian and Arabic mehndi traditions, and they combine well because their widths and curves are similar.
- Teardrop: a small filled almond shape used as a petal, a leaf, or the cap of a vine. Draw the outline, then fill by layering thin lines side by side.
- Dot: a small round mark used to anchor a line, fill negative space, or sit inside a flower. Dots are also the easiest motif to use for corrections because one dot can be added without redrawing the surrounding work.
- Thin vine: a single curved line, usually 0.5-1 mm wide, that connects motifs. Vines that vary slightly in curve look more natural than perfectly even ones.
- Simple flower: a central dot surrounded by four to five teardrop petals. Add a smaller dot inside the center if the paste still flows well.
- Leaf: a pointed teardrop with a single thin line down its middle. Useful for filling the spaces between larger motifs.
With those five shapes, a beginner can produce a dozen distinct patterns just by changing the spacing and the connecting vines. Variety in a simple mehndi design usually comes from arrangement, not from learning new shapes.
A step-by-step application on one hand
The procedure below is the one most beginner artists find easiest to repeat. It assumes the wearer is seated, the hands are clean and dry, and the artist is working on the wearer’s right hand first.
- Wipe the back of the hand with a small amount of lemon-sugar mixture on a cotton pad. This removes surface oil and helps the paste grip.
- Draw a light guide line on the wrist with the cone, about 1 cm above the wrist crease, curving gently to follow the hand. This becomes the base of the cuff.
- Place a single motif in the center of the cuff area. Keep the motif under 3.5 cm tall so it does not dominate the hand.
- Add two thin vines that curve away from the central motif toward the outer wrist. Stop each vine with a small dot or teardrop.
- Move to the back of the hand. Place a small flower or three-dot cluster, leaving at least 1 cm of clear skin between it and the cuff motifs.
- Draw a thin line from the back-of-hand motif toward the base of the index finger, then down the side of the index finger. Stop 3-4 mm before the nail bed.
- Repeat the line on the little finger for symmetry. Skip the middle and ring fingers, or add a single dot at their base.
- Check the design from arm’s length. If any two motifs are touching or look crowded, leave them; they can be lifted with a damp cotton tip after the paste is removed if needed.
- Allow the paste to dry for 8-12 hours, then scrape it off with a blunt edge and avoid water for the first 12 hours after removal to deepen the stain.
Most beginners overestimate how much design fits in step 3 and 5. If the cuff motif grows past 4 cm or the back-of-hand cluster grows past three shapes, the design is no longer simple. Stop the cone and let the wearer decide whether to extend the pattern or keep the current restraint.
Choosing a style that fits the wearer
Simple is a description of density, not a style. The same level of restraint can be drawn in motifs drawn from several traditions, and the right choice depends on the wearer, the occasion, and how long the stain needs to last.
| Style | Visual character | Best for | Typical elements in a simple pattern |
|---|---|---|---|
| Arabic | Open, flowing, large leaves with clear space | Daytime events, Eid, casual celebrations | One or two large leaves, a thin vine, scattered dots |
| Indian | Dense but with a clear central motif | Weddings, formal functions, longer wear | Paisley on the palm, small grid patterns on fingers |
| Pakistani / Indo-Arabic | Symmetric, with dot-heavy fillers | Engagement events, family gatherings | Symmetric cuff, paired motifs, denser dot work |
| Minimal / modern | Geometric, single-line, or tiny accents | Office wear, first-time wearers, children | Thin trailing line, one small motif, ring-style bands |
For a wearer who is new to mehndi, a modern minimal pattern is usually the safest choice because it gives the artist fewer chances to make a visible mistake. For a wearer who wants a more traditional look, an Arabic pattern with one or two large leaves tends to age well because the leaves have enough clear skin around them to remain visible as the stain fades.
Common mistakes and how to fix them
Most early mistakes are structural rather than technical. A wobbling line is far less noticeable than a motif placed over a joint or a vine that pulls the eye in an awkward direction. The list below covers the errors that show up most often in first-time applications.
- Crowding: motifs are too close together, so the stain merges during oxidation. Fix by leaving at least 1 cm between motifs on the back of the hand.
- Running past the wrist crease: the pattern cracks when the wrist bends. Fix by stopping the cuff 1 cm above the crease, even if the available wrist area feels larger than that.
- Heavy palms: the palm fades fastest and looks patchy. Fix by limiting palm work to a single line or a small cluster of dots.
- Full rings on fingers: rings smear quickly and are hard to keep symmetrical. Fix by drawing an open ring or a band of three dots instead.
- Uneven pressure: lines that get thicker as the artist tires. Fix by resting the cone hand on the wearer’s hand and squeezing with the thumb rather than the whole hand.
- Smudging during drying: the wearer touches the paste before it sets. Fix by reminding the wearer to keep the hand still and palm-up for the first 15 minutes.
Most of these issues are easier to prevent than to correct. The corrections usually involve waiting for the paste to dry and then lifting the unwanted line with a damp cotton tip, which is slow and slightly irritating to the skin.
Aftercare that deepens and extends the stain
A simple mehndi design tends to last longer than a dense one because the stain is not fighting against itself. Even so, aftercare makes a real difference in color depth during the first 48 hours and in how evenly the pattern fades over the following two weeks.
- Leave the paste on for at least 6 hours. Overnight is the traditional choice and usually produces the deepest color.
- Scrape the paste off with a blunt edge such as a spoon or a credit card. Do not wash it off with water; washing can lift some of the dye that has not yet bonded with the skin.
- Avoid water on the design for 12-24 hours after paste removal. This includes handwashing, dishwashing, and swimming.
- Apply a small amount of eucalyptus oil or a balm containing natural oils to the design before any unavoidable contact with water. The oil acts as a temporary barrier.
- Expect the stain to start as orange, deepen to a reddish brown over 24-48 hours, and then gradually fade over 1-3 weeks depending on skin type and washing frequency.
Skin that is warm, well exfoliated, and lightly oiled tends to take a deeper stain than skin that is dry. A small amount of sugar scrub on the back of the hand an hour before application can help, but it should be gentle so the skin is not irritated when the cone is applied.
Adapting a simple pattern for children and first-time wearers
Children, first-time adult wearers, and anyone who is nervous about the application tend to do best with patterns that finish in under 10 minutes. The aim is to give them a clean first experience so they feel comfortable returning. A few adaptations make that easier.
- Limit the design to one hand and to a single zone such as the wrist cuff or the back of the hand.
- Use motifs that the wearer has already asked for. A small flower, a heart, or a name initial often feels more meaningful than a generic pattern.
- Avoid the palm and the fingers. Both zones are more sensitive and the paste is harder to keep still there.
- Keep the design under 4 cm in its longest dimension so the wearer can see the whole pattern at a glance.
- Plan a short conversation during the application. A calm wearer holds their hand more steadily, which produces a cleaner pattern.
For very young children, a tiny motif on the back of the hand or a single small bracelet-style cuff on the wrist is usually enough. Trying to add a second zone often ends with the child pulling their hand away mid-line, which is harder to repair than a finished simple design is to extend on a later visit.
Building a small portfolio of simple patterns
Most working artists settle on a personal library of around five to ten patterns they can draw without referring to references. That library usually includes one pattern per common occasion, plus one or two modern minimal patterns for office or everyday wear. Building the library works best in a few stages.
- Practice each new pattern on paper first. A pencil drawing of the layout catches spacing problems faster than a cone on skin does.
- Test the pattern on your own hand, then on a friend’s hand. Each new surface shows whether the spacing still works on a different hand shape.
- Photograph the finished design once the paste is removed and the stain has settled for 24 hours. The post-oxidation color is what the wearer will actually see.
- Note any corrections that became necessary during the application. Those notes are the most useful part of a personal portfolio.
- Retire patterns that consistently take more than 25 minutes to apply. A pattern that takes that long is no longer simple, even if its elements are small.
A simple mehndi design library does not need to be large. Five reliable patterns cover most appointments. Adding more becomes useful only if the artist is taking on a wider range of occasions or wearers with more specific requests.
Safety, allergies, and honest communication
Natural henna paste, made from dried henna leaves, water, sugar, and a small amount of oil, is generally considered safe for short-term skin application. So-called “black henna” often contains paraphenylenediamine, a chemical dye that can cause severe allergic reactions and permanent skin sensitivity. Artists should be ready to explain which paste they are using and to refuse to apply any paste whose ingredients they cannot name.
For first-time wearers, a small patch test on the inner wrist about 24 hours before the appointment is a sensible precaution. Any itching, burning, or redness during the application is a signal to remove the paste immediately with water and to skip the rest of the design. A simple pattern is also a good way to test a new wearer, because there is less paste in contact with the skin and less time spent holding the cone close to a sensitive area.
Frequently asked questions
How long does a simple mehndi design take to apply?
Most simple patterns take 12-20 minutes per hand for a beginner and around 8-12 minutes for a more experienced artist. Designs that take longer than 25 minutes are usually no longer simple in practice, even if their motifs are small.
How long will the stain last?
A simple mehndi design usually lasts 1-3 weeks, depending on skin type, how often the hands are washed, and how much the design is exposed to friction. Palm designs fade fastest because the skin there exfoliates quickly. Designs on the back of the hand and the wrist tend to last the longest.
Can I draw a simple pattern on myself?
Self-application is possible, especially for wrist and inner-arm patterns. The back of the dominant hand is harder to reach with a steady hand. Most self-taught artists start with a single motif on the wrist and build up to larger patterns as their cone control improves.
Is simple the same as minimal or modern?
Simple refers to density and readability. Minimal or modern is one style that often uses simple layouts but is defined by its motifs, which are usually geometric or single-line. A simple pattern can be drawn in Arabic, Indian, Pakistani, or modern minimal styles.
What is the best cone tip size for a beginner?
A tip opening of about 1 mm is a good starting size for outlines. Smaller tips break the line easily; larger tips flood the paste and reduce control. A second cone with a 1.5-2 mm tip is useful for filling teardrops and petals.
How dark should a mehndi stain be after removal?
The paste will leave an orange stain that deepens to a reddish brown over 24-48 hours. A bright orange stain after the first 12 hours is normal and not a sign of a weak paste. Final depth varies by skin type, body temperature, and how long the paste was left on.
Can I shower or wash my hands after the paste is removed?
It is best to avoid water on the design for 12-24 hours after paste removal. A small amount of eucalyptus oil or a natural balm can act as a temporary barrier when handwashing cannot be avoided. After the first day, normal washing is fine and the pattern will continue to deepen slightly.
What should I do if the wearer is allergic to the paste?
Stop the application immediately, remove the paste with water, and skip the rest of the design. Any persistent redness, swelling, or itching should be reviewed by a medical professional. Future appointments should be avoided unless an allergist has confirmed the cause.
Is a simple mehndi design appropriate for formal events?
Yes, particularly for daytime events, office settings, and engagements where a quieter look is preferred. For evening weddings or larger traditional functions, a more elaborate pattern is often expected, but a well-executed simple design still reads as intentional rather than sparse.
How do I keep the paste from drying inside the cone?
Cap the cone tip with a small piece of tape when not in use, and store the cone in a sealed plastic bag. Most artists also keep a damp tissue inside the bag to keep the air around the cone humid. A cone that has been open for more than 2-3 hours usually needs to be refilled with fresh paste.